

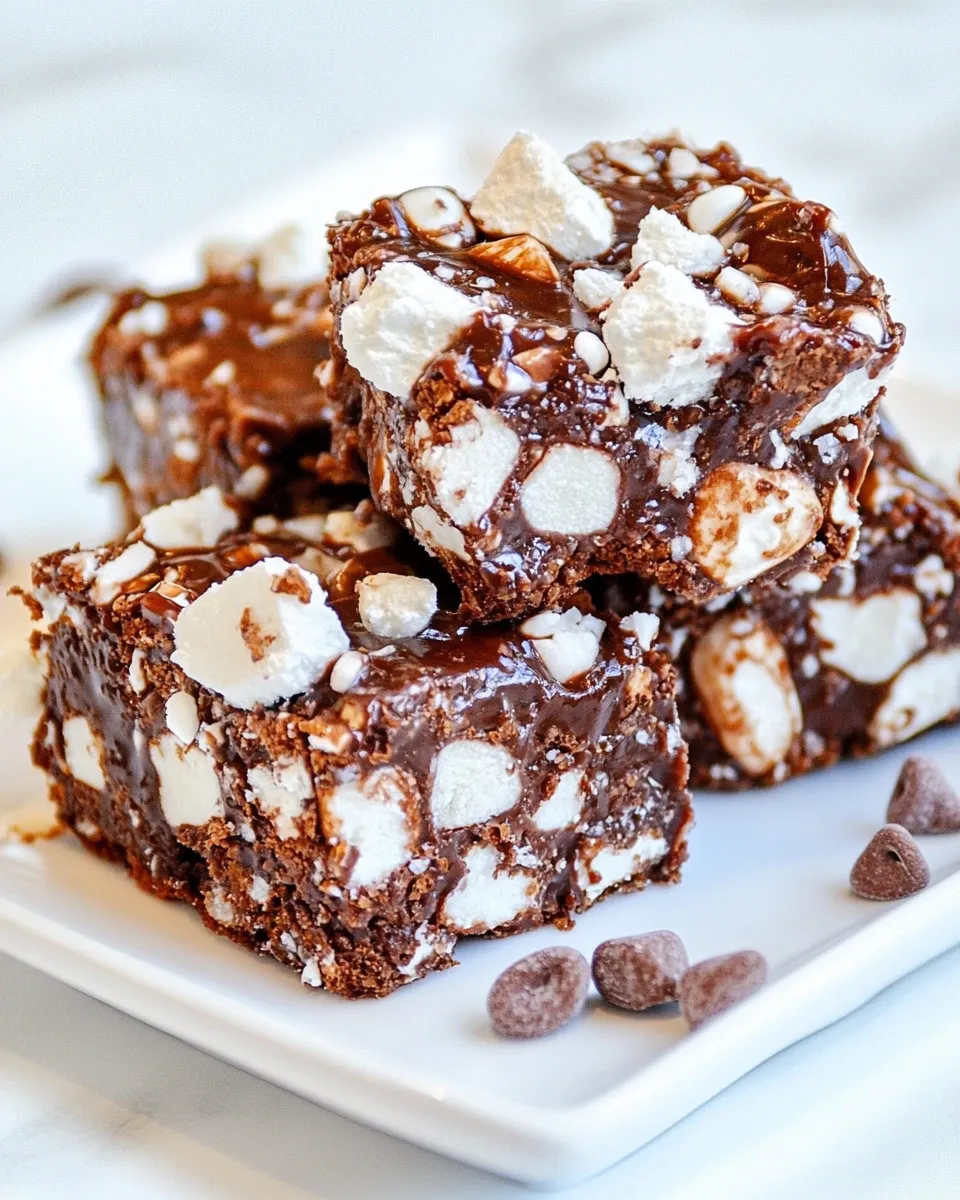
Indulging in a sweet treat can bring joy to any day, and Rocky Road Candy is a classic that never fails to please. This delightful confection combines the rich creaminess of chocolate with the chewy goodness of marshmallows and the satisfying crunch of nuts, making it a perfect go-to for any occasion. Whether you’re hosting a party, celebrating a holiday, or simply craving something sweet, this recipe will not disappoint. Follow along as we explore what makes this Rocky Road Candy special, the ingredients you’ll need, and easy steps to create this delicious treat at home.
What Sets This Recipe Apart

Rocky Road Candy is not just any dessert; it’s a nostalgic treat that evokes memories of carefree childhood days and delightful gatherings. What sets this recipe apart is its simplicity and versatility. With just a handful of ingredients, you can whip up a batch in no time. The combination of semi-sweet chocolate, fluffy marshmallows, and crunchy nuts creates a harmonious balance of flavors and textures that can be easily customized to suit your taste. Plus, it’s a no-bake recipe, which means less hassle and more enjoyment!
What We’re Using
To create your very own Rocky Road Candy, gather the following ingredients:
- 12 ounces semi-sweet chocolate chips
- 4 cups mini marshmallows
- 1/3 cup chopped nuts (such as walnuts or almonds)
These simple ingredients come together to create a treat that is both satisfying and delightful, making it perfect for sharing with friends and family.
Must-Have Equipment
Before you get started, make sure you have the following equipment on hand:
- Microwave-safe bowl: For melting the chocolate chips.
- Spatula: To mix the ingredients together smoothly.
- 9×9 inch baking pan: To pour and set your candy.
- Parchment paper: For easy removal of the finished candy.
Having these tools ready will streamline the process, allowing you to focus on creating your delicious Rocky Road Candy.
Make Rocky Road Candy: A Simple Method
Creating Rocky Road Candy is a straightforward process that can be broken down into a few easy steps. Let’s dive into the method!
Step 1: Melt the Chocolate
Start by placing the semi-sweet chocolate chips in a microwave-safe bowl. Microwave them in 30-second intervals, stirring in between until the chocolate is completely melted and smooth. Be cautious not to overheat, as chocolate can burn easily.
Step 2: Combine Ingredients
Once the chocolate is melted, remove it from the microwave and allow it to cool for a minute. Then, gently fold in the mini marshmallows and chopped nuts. Make sure everything is well combined, and the marshmallows are evenly coated in chocolate.
Step 3: Pour into the Pan
Line your 9×9 inch baking pan with parchment paper for easy removal. Pour the chocolate mixture into the pan, spreading it out evenly with your spatula. Use the spatula to smooth the top, ensuring an even layer.
Step 4: Chill and Set
Place the pan in the refrigerator for about 1-2 hours to allow the candy to set. Once the chocolate is firm, you can remove the candy from the pan by lifting the parchment paper.
Step 5: Cut and Serve
Using a sharp knife, cut the Rocky Road Candy into squares or bars. Serve them immediately or store them for later enjoyment. These delightful treats are sure to be a hit!
Vegan & Vegetarian Swaps

If you’re looking to make a vegan or vegetarian version of Rocky Road Candy, consider these swaps:
- Chocolate: Use dairy-free chocolate chips instead of semi-sweet chocolate chips.
- Nuts: Opt for raw or roasted nuts of your choice for added flavor.
- Marshmallows: Select vegan marshmallows, which are available in many stores.
These simple substitutions ensure that everyone can enjoy this delicious treat, regardless of dietary preferences.
Mistakes That Ruin Rocky Road Candy
To help you achieve the perfect Rocky Road Candy, here are some common mistakes to avoid:
- Overheating the chocolate: Take care not to microwave the chocolate for too long, as burnt chocolate can ruin the flavor and texture.
- Not cooling the chocolate: Allowing the melted chocolate to cool slightly before adding the marshmallows can help prevent them from melting.
- Skipping the parchment paper: This can make it challenging to remove the candy from the pan without breaking it.
- Not allowing enough time to set: Be patient; letting the candy chill thoroughly is essential for achieving the right texture.
By being mindful of these tips, you’ll create a batch of Rocky Road Candy that is sure to impress.
Meal Prep & Storage Notes
To keep your Rocky Road Candy fresh and delicious, consider the following tips for meal prep and storage:
Store the candy in an airtight container at room temperature for up to one week. If you’d like to extend its shelf life, you can refrigerate it, where it will keep for up to two weeks. For longer storage, freeze the candy in freezer-safe bags or containers, and it can last for up to three months. Just remember to let it thaw at room temperature before enjoying!
Handy Q&A
Can I use different types of chocolate?
Absolutely! Feel free to experiment with milk chocolate, dark chocolate, or even white chocolate for a different flavor profile. Just keep in mind that the sweetness level may vary.
Can I add other mix-ins?
Yes! Rocky Road Candy is highly customizable. You can add dried fruits, crushed cookies, or even flavored chips to make it your own.
Is there a way to make this recipe gluten-free?
Yes! All the ingredients listed are naturally gluten-free. Just double-check the labels on your chocolate chips and marshmallows to ensure they are certified gluten-free.
How can I make my Rocky Road Candy look more appealing?
For a decorative touch, consider drizzling melted chocolate over the top or sprinkling additional nuts or sprinkles before the candy sets. This adds a beautiful finish that is sure to impress!
If you enjoyed making Rocky Road Candy, you might also like these delicious recipes:
Bring It Home
Rocky Road Candy is a delightful treat that brings together the best of chocolate, marshmallows, and nuts. Its simplicity and versatility make it an ideal recipe for anyone looking to whip up something sweet and satisfying. Whether you enjoy it as a snack, dessert, or gift, this candy is sure to bring smiles to those who indulge. So gather your ingredients, follow the steps, and enjoy creating your very own batch of Rocky Road Candy today! Happy cooking!

Rocky Road Candy
Ingredients
- 12 ounces semi-sweet chocolate chips
- 4 cups mini marshmallows
- 1/3 cup chopped nuts (such as walnuts or almonds)
Instructions
- Start by placing the semi-sweet chocolate chips in a microwave-safe bowl. Microwave them in 30-second intervals, stirring in between until the chocolate is completely melted and smooth. Be cautious not to overheat, as chocolate can burn easily.
- Once the chocolate is melted, remove it from the microwave and allow it to cool for a minute. Then, gently fold in the mini marshmallows and chopped nuts. Make sure everything is well combined, and the marshmallows are evenly coated in chocolate.
- Line your 9x9 inch baking pan with parchment paper for easy removal. Pour the chocolate mixture into the pan, spreading it out evenly with your spatula. Use the spatula to smooth the top, ensuring an even layer.
- Place the pan in the refrigerator for about 1-2 hours to allow the candy to set. Once the chocolate is firm, you can remove the candy from the pan by lifting the parchment paper.
- Using a sharp knife, cut the Rocky Road Candy into squares or bars. Serve them immediately or store them for later enjoyment. These delightful treats are sure to be a hit!
Equipment
- Microwave-Safe Bowl
- Spatula
- 9x9-inch Baking Pan
- Parchment Paper
Notes
- Store the candy in an airtight container at room temperature for up to one week.
- For longer storage, refrigerate the candy for up to two weeks.
- Freeze the candy in freezer-safe bags for up to three months; let it thaw at room temperature before enjoying.


