
There’s something undeniably satisfying about a sweet treat that’s both crunchy and creamy, and these Crunchy Peanut Butter Bars deliver on both fronts. Imagine biting into a rich, buttery bar that combines the delightful flavors of peanut butter and chocolate. This recipe is not only simple to whip up but also perfect for gatherings, snacks, or a little indulgence after a long day. Let’s dive into the magic of these Crunchy Peanut Butter Bars that will have your taste buds dancing with joy!
What Makes This Recipe Special
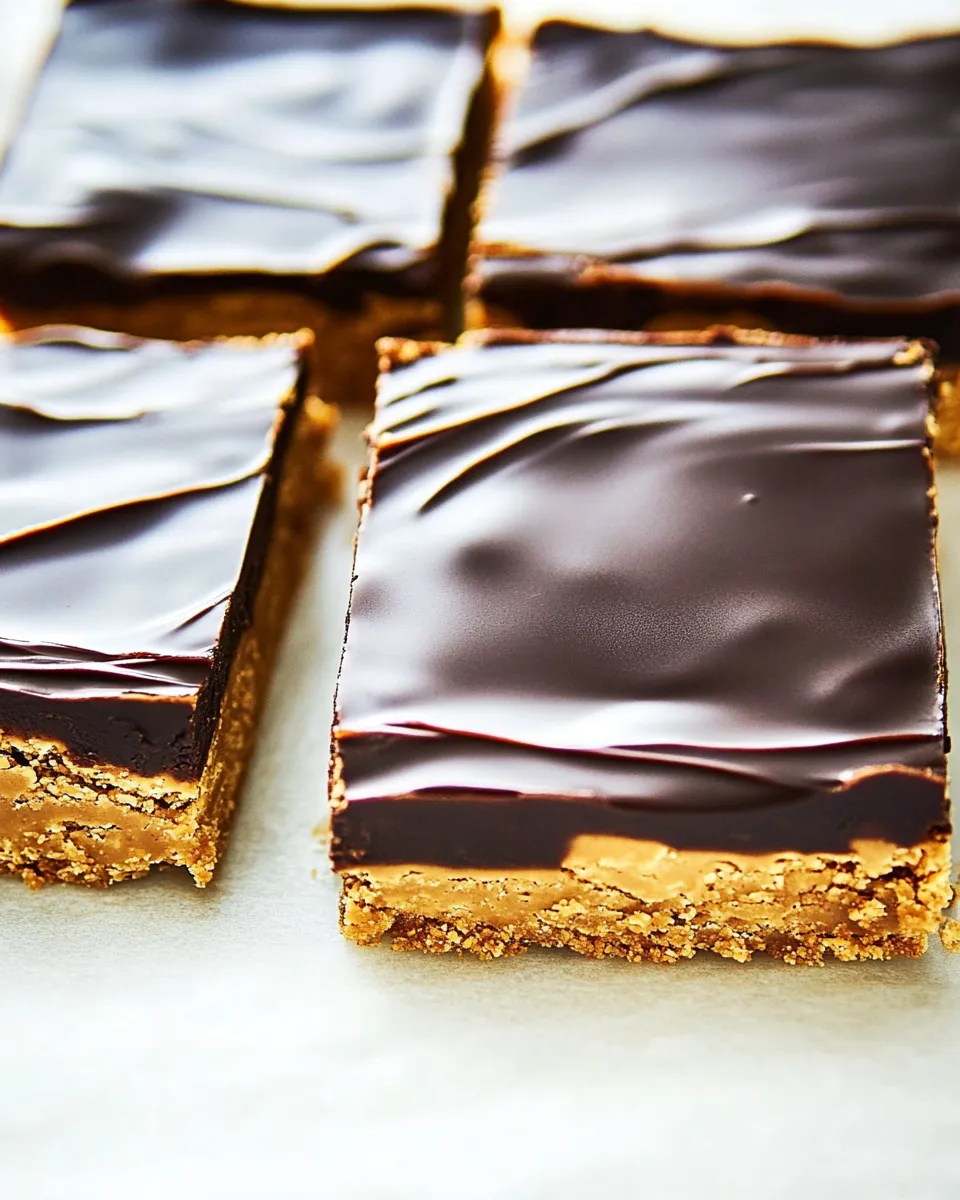
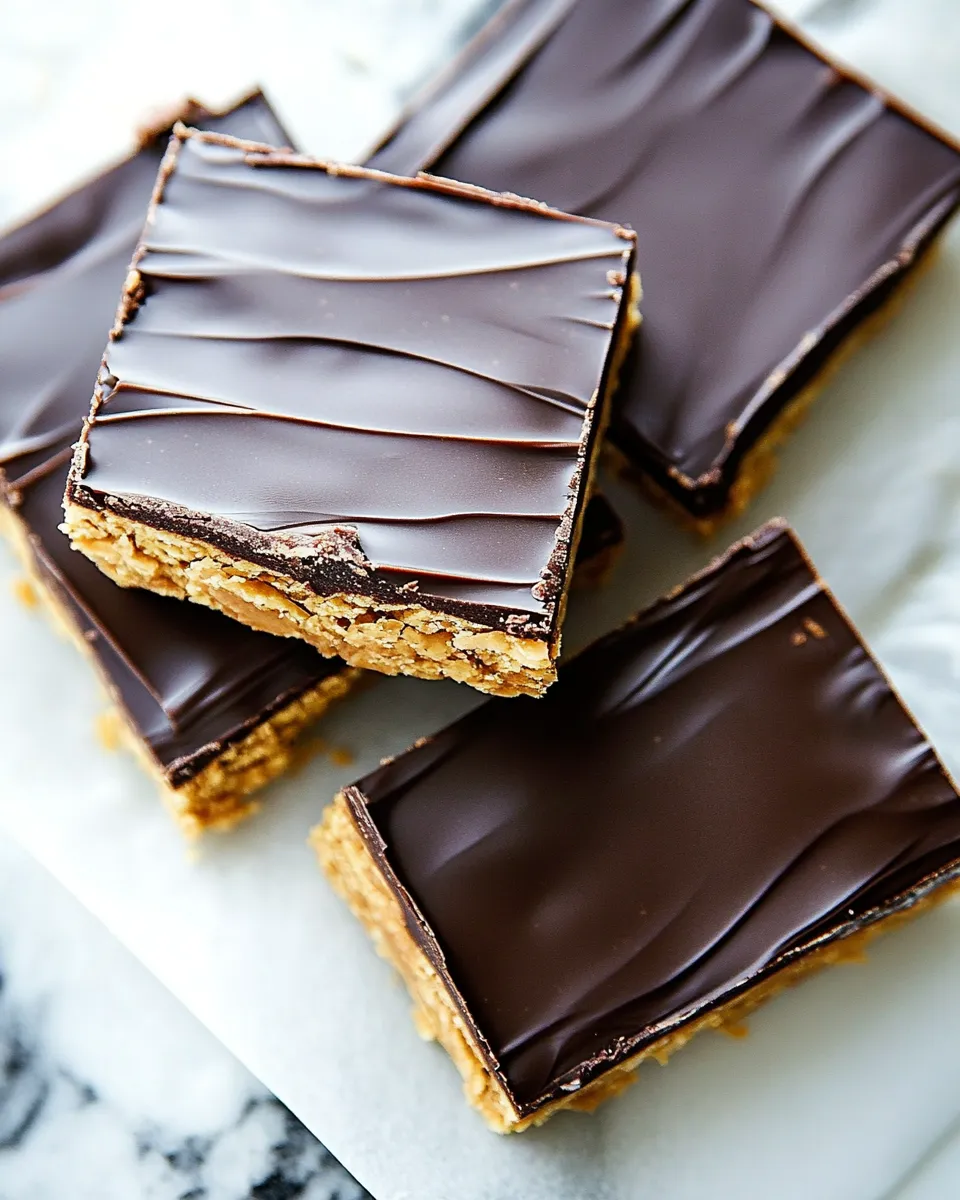
What truly sets these Crunchy Peanut Butter Bars apart is the combination of textures and flavors. The creamy peanut butter pairs beautifully with the crunchy Rice Krispies, while the layer of chocolate on top adds a rich, decadent finish. It’s a no-bake dessert, making it an easy choice for busy bakers or those who simply want something delicious without heating up the kitchen. Plus, they are great for meal prep and can be stored for days, making them an ideal treat to have on hand.
What’s in the Bowl
To create these delightful Crunchy Peanut Butter Bars, gather the following ingredients:
- 1 cup melted salted butter
- 1 cup graham cracker crumbs
- 1 cup powdered sugar
- 1 cup creamy peanut butter
- 1 cup Rice Krispies cereal
- 1 cup dark or milk chocolate chips
- 2 tablespoons coconut oil
Each ingredient plays a crucial role in creating the perfect bite of these Crunchy Peanut Butter Bars, blending together for a harmoniously sweet and salty experience.
Tools & Equipment Needed
Before you get started, gather these tools to make the process smooth and efficient:
- Mixing Bowl: For combining the ingredients.
- 9×9-inch Baking Pan: To hold your bars as they set.
- Spatula: For evenly spreading the mixture.
- Microwave-Safe Bowl: For melting the chocolate and coconut oil.
- Parchment Paper: To line the baking pan for easy removal.
Having these tools on hand will ensure that your baking experience is as enjoyable as the final product!
Crunchy Peanut Butter Bars, Made Easy
Now, let’s get to the fun part! Follow these simple steps to whip up your Crunchy Peanut Butter Bars.
Step 1: Prepare the Pan
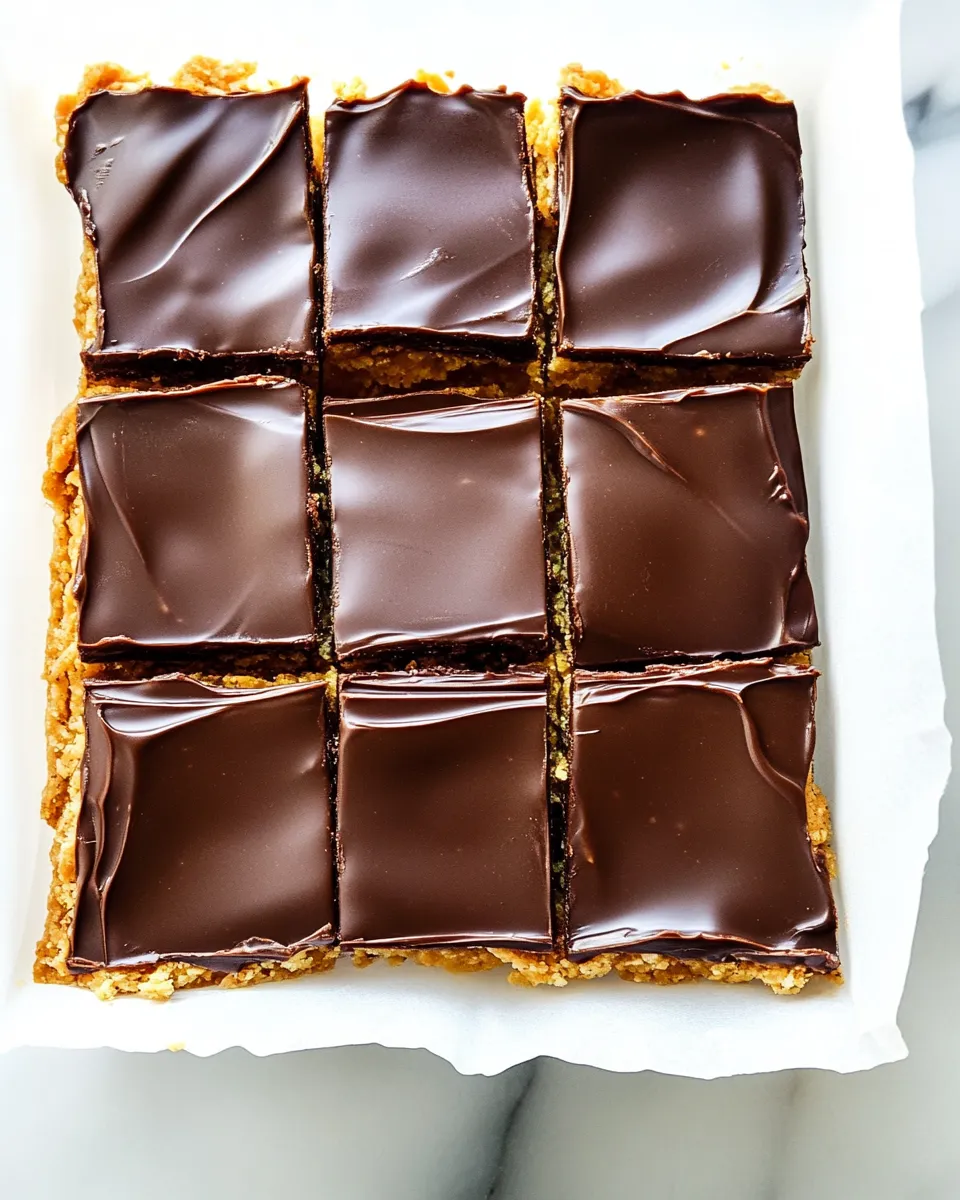
Start by lining a 9×9-inch baking pan with parchment paper, leaving a bit overhanging on the sides. This will make it easy to lift the bars out once they’re set.
Step 2: Mix the Base
In a large mixing bowl, combine the melted salted butter, graham cracker crumbs, and powdered sugar. Mix well until the ingredients are fully incorporated and smooth.
Step 3: Add Peanut Butter
Stir in the creamy peanut butter until the mixture is completely combined. The warmth of the melted butter will help the peanut butter blend easily into the mixture.
Step 4: Fold in the Crunch
Gently fold in the Rice Krispies cereal until they are evenly distributed throughout the mixture. This is where you’ll get that delightful crunch!
Step 5: Press into the Pan
Transfer the mixture into the prepared baking pan. Use a spatula to press it down firmly and evenly. This will help the bars hold their shape once set.
Step 6: Melt the Chocolate
In a microwave-safe bowl, combine the chocolate chips and coconut oil. Microwave in 30-second intervals, stirring in between, until the mixture is completely melted and smooth.
Step 7: Pour and Spread
Pour the melted chocolate over the peanut butter mixture in the pan. Use the spatula to spread it evenly across the top, ensuring it covers all edges.
Step 8: Chill and Set
Place the baking pan in the refrigerator for at least 2 hours, or until the chocolate is set and the bars are firm enough to cut.
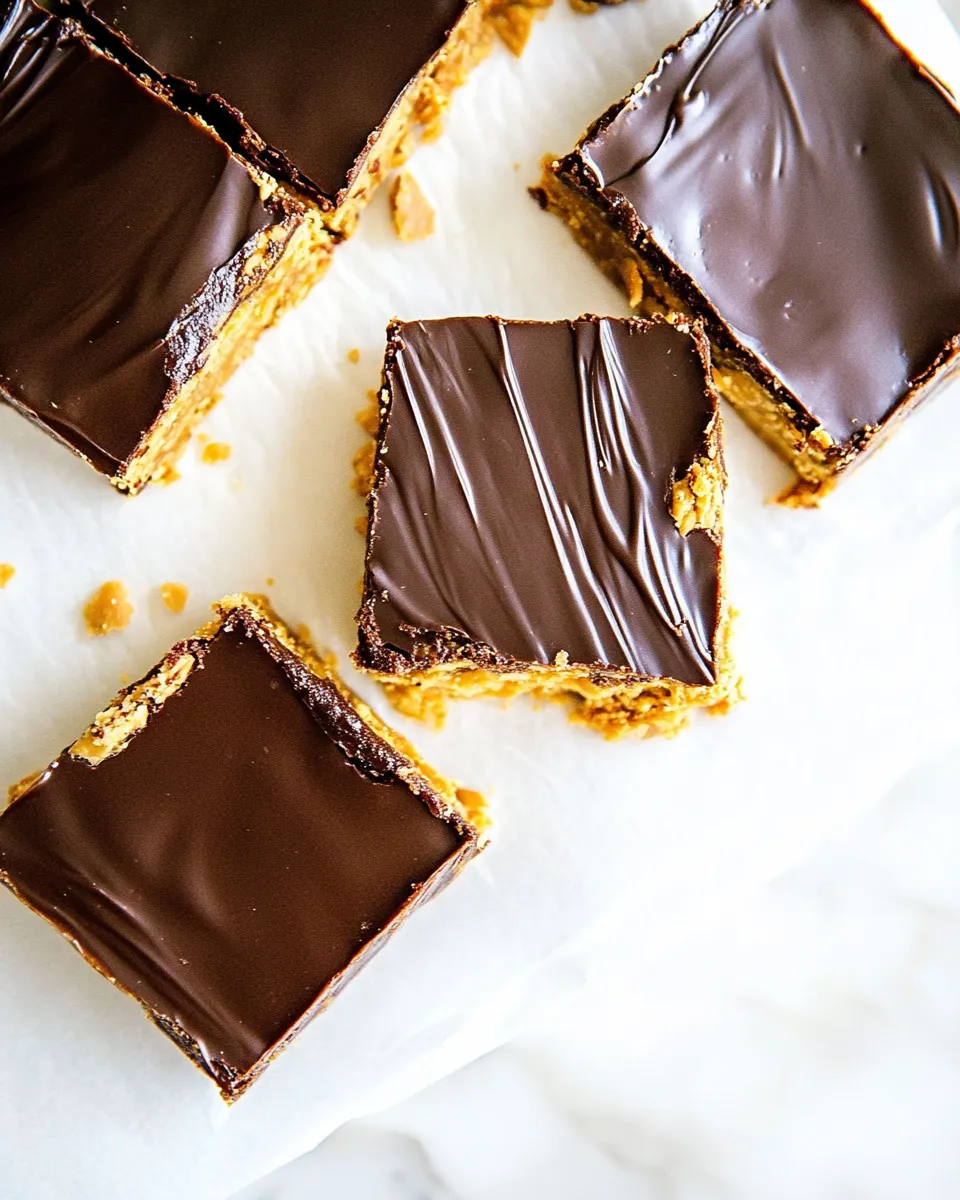
Step 9: Slice and Enjoy
Once set, lift the bars out of the pan using the parchment paper overhang. Cut into squares or rectangles, depending on your preference. Enjoy your Crunchy Peanut Butter Bars!
Adaptations for Special Diets
These Crunchy Peanut Butter Bars can easily be adapted to suit various dietary needs:
- Gluten-Free: Use gluten-free graham cracker crumbs or a suitable alternative.
- Vegan: Substitute the butter with a vegan butter alternative and use dairy-free chocolate chips.
- Lower Sugar: Replace powdered sugar with a sugar alternative like powdered erythritol.
- Nut-Free: Swap the peanut butter for sunflower seed butter for a nut-free option.
With these adaptations, everyone can enjoy the deliciousness of Crunchy Peanut Butter Bars!
Learn from These Mistakes
Making Crunchy Peanut Butter Bars is pretty straightforward, but here are some common pitfalls to avoid:
- Overmixing: When combining the ingredients, be careful not to overmix, especially after adding the Rice Krispies, to maintain their crunch.
- Skipping the Chill: Don’t rush the chilling process! Allow the bars to set completely to achieve the right texture.
- Using the Wrong Pan: Using a pan that is too large may result in thinner bars that don’t hold up well. Stick to the recommended size for best results.
- Melting Chocolate Incorrectly: Always melt chocolate in short intervals and stir frequently to prevent burning.
By keeping these tips in mind, you’ll ensure a perfect batch every time!
Make Ahead Like a Pro
These Crunchy Peanut Butter Bars are fantastic for meal prep and can be made ahead of time. Here are some tips:
- Storage: Once cut, store the bars in an airtight container in the refrigerator for up to a week.
- Freezing: You can also freeze the bars for longer storage. Just wrap them individually in plastic wrap and place them in a freezer-safe container.
- Thawing: When ready to enjoy, simply thaw them in the fridge overnight or at room temperature for a couple of hours.
With these make-ahead strategies, you’ll always have a delicious treat ready to go!
Popular Questions
Can I use crunchy peanut butter instead of creamy?
Absolutely! Using crunchy peanut butter will add an extra layer of texture to your bars, making them even more delightful.
How do I know when the bars are set?
The bars are set when the chocolate layer is firm to the touch, and the entire mixture feels solid. This usually takes about 2 hours in the refrigerator.
What can I use instead of coconut oil?
You can substitute coconut oil with any neutral oil, such as vegetable oil or canola oil, though it may slightly alter the flavor.
Are these bars suitable for kids?
Yes! Crunchy Peanut Butter Bars are a kid-friendly treat, but be sure to check for any nut allergies before serving.
If you love these Crunchy Peanut Butter Bars, you might also enjoy these reader favorites:
These recipes will surely satisfy your sweet tooth and complement your Crunchy Peanut Butter Bars perfectly!
Let’s Eat
Now that you have all the information you need to create the most delicious Crunchy Peanut Butter Bars, it’s time to get into the kitchen and start baking! Whether it’s for a special occasion or just a treat for yourself, these bars are sure to become a favorite. Enjoy the delightful crunch, the creamy peanut butter flavor, and the decadent chocolate topping. Happy baking!

Crunchy Peanut Butter Bars
Ingredients
- 1 cup melted salted butter
- 1 cup graham cracker crumbs
- 1 cup powdered sugar
- 1 cup creamy peanut butter
- 1 cup Rice Krispies cereal
- 1 cup dark or milk chocolate chips
- 2 tablespoons coconut oil
Instructions
- Start by lining a 9x9-inch baking pan with parchment paper, leaving a bit overhanging on the sides.
- In a large mixing bowl, combine the melted salted butter, graham cracker crumbs, and powdered sugar. Mix well until smooth.
- Stir in the creamy peanut butter until completely combined.
- Gently fold in the Rice Krispies cereal until evenly distributed.
- Transfer the mixture into the prepared baking pan and press it down firmly and evenly.
- In a microwave-safe bowl, combine the chocolate chips and coconut oil. Microwave in 30-second intervals, stirring until melted and smooth.
- Pour the melted chocolate over the peanut butter mixture and spread it evenly across the top.
- Place the baking pan in the refrigerator for at least 2 hours, or until the chocolate is set.
- Once set, lift the bars out of the pan using the parchment paper overhang and cut into squares.
Equipment
- Mixing Bowl
- 9x9-inch Baking Pan
- Spatula
- Microwave-Safe Bowl
- Parchment Paper
Notes
- Store in an airtight container in the refrigerator for up to a week.
- Freeze individually wrapped for longer storage.
- Thaw in the fridge overnight or at room temperature.


