
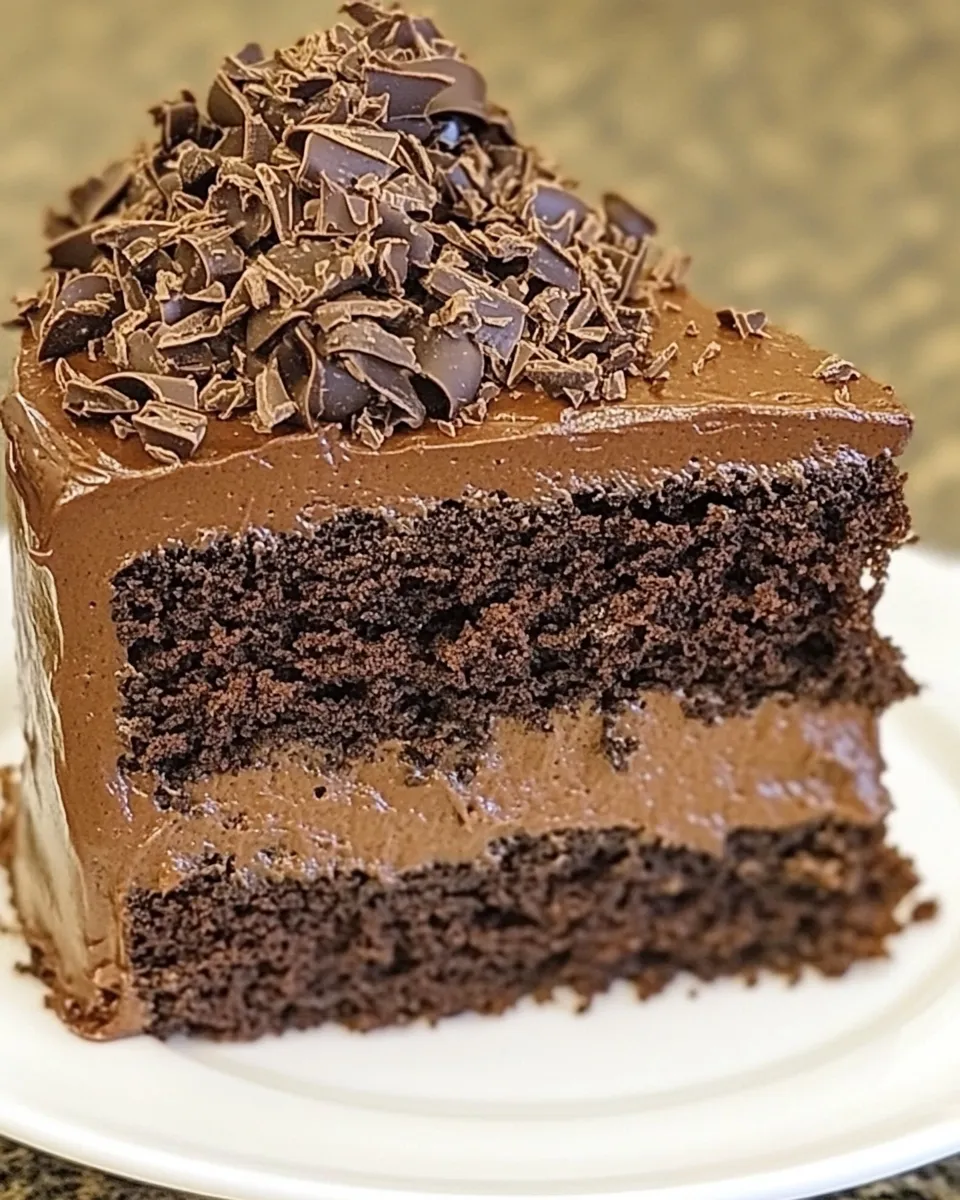
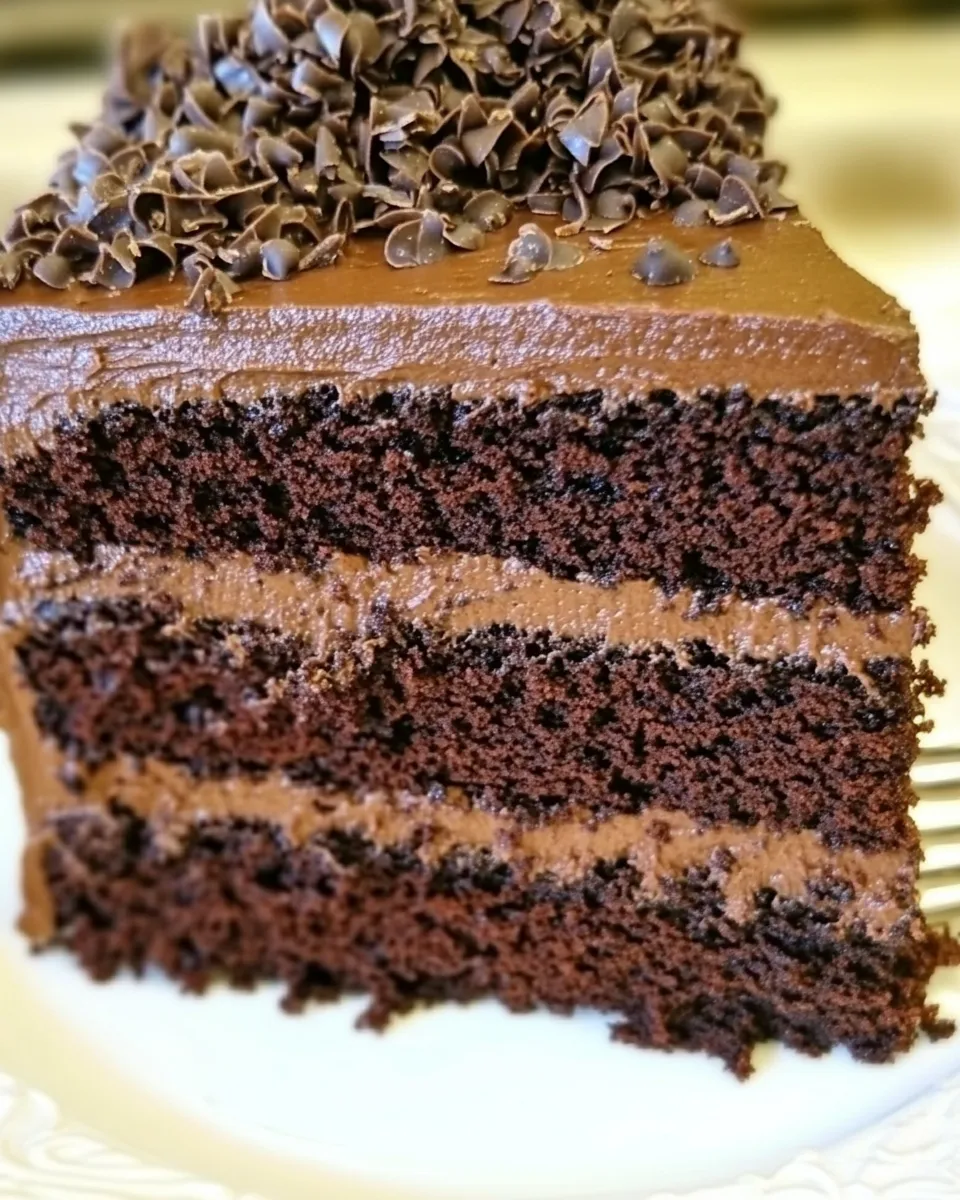
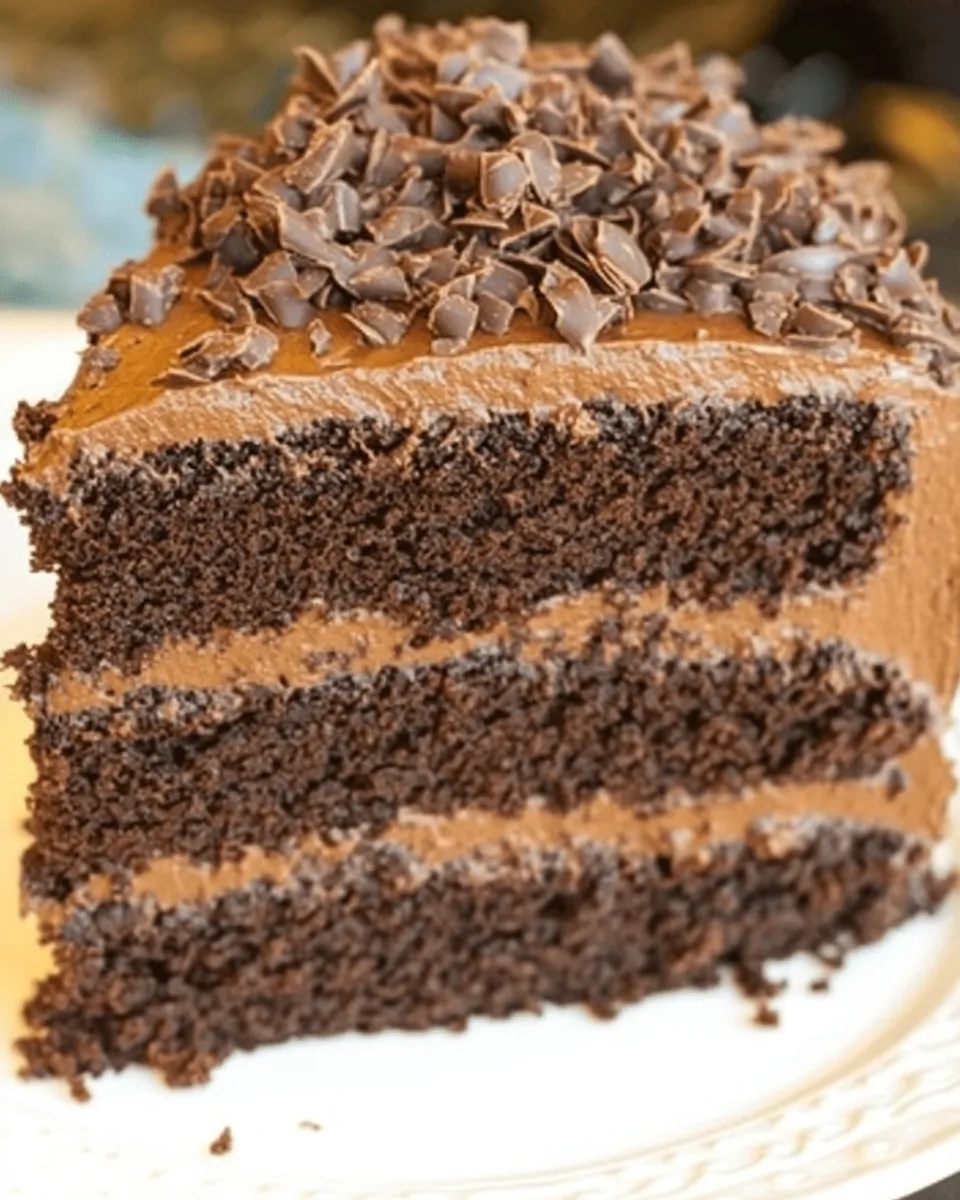
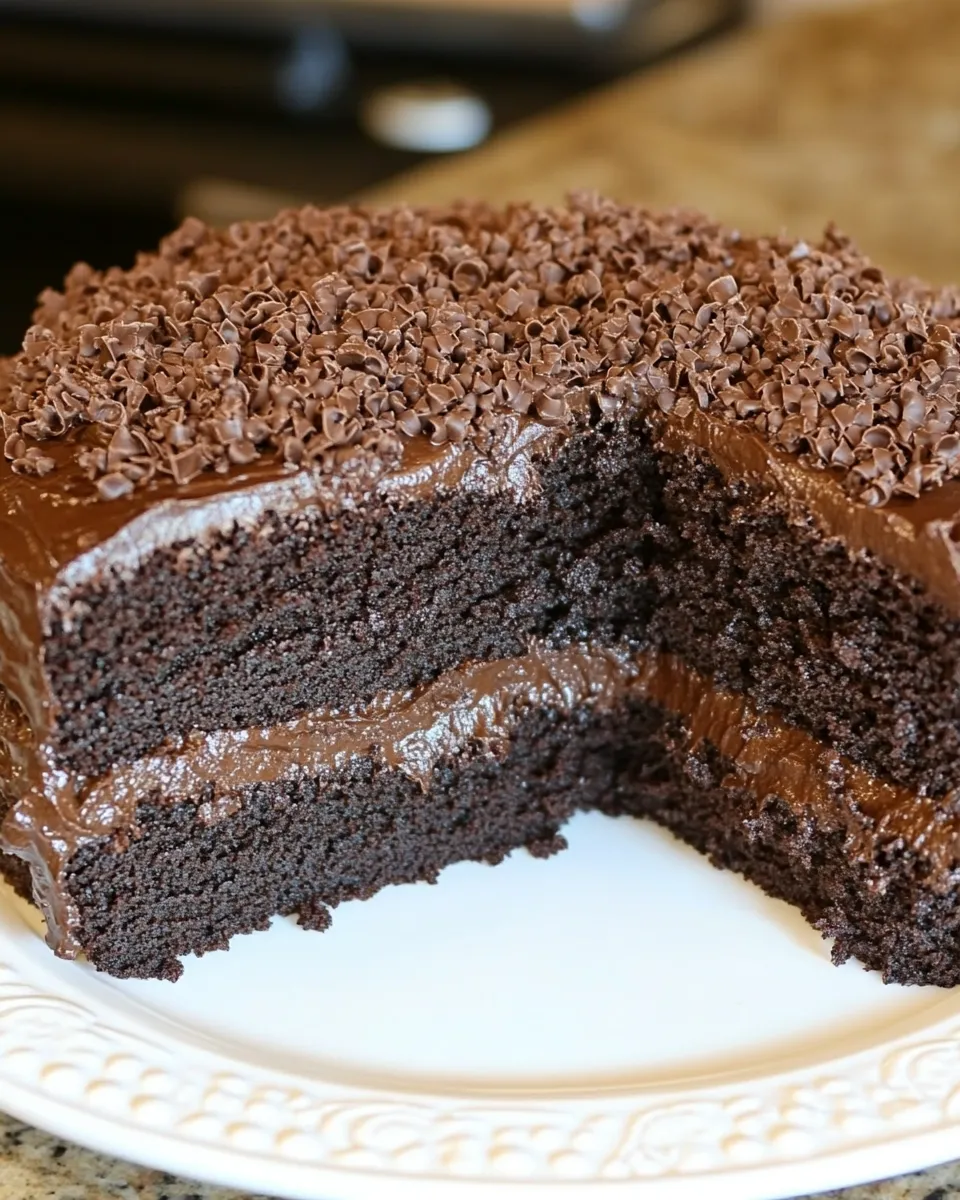
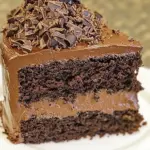
Indulging in a slice of Chocolate Blackout Cake is like diving into a rich, velvety dream of chocolate bliss. This decadent dessert boasts layers of moist chocolate cake enveloped in a creamy, fudgy chocolate frosting that will satisfy even the most intense chocolate cravings. Perfect for celebrations or simply as a treat to enjoy at home, this cake is a showstopper in both flavor and presentation. Prepare to roll up your sleeves and get ready to impress everyone with a dessert that is truly irresistible.
Why Cooks Rave About It
The allure of Chocolate Blackout Cake goes beyond its rich chocolate flavor. Cooks rave about this cake for several reasons:
- Deep Chocolate Flavor: The combination of unsweetened chocolate and Dutch-processed cocoa powder creates a chocolatey depth that is unparalleled.
- Moist and Tender Crumb: The addition of buttermilk and coffee ensures that each slice is moist and flavorful.
- Decadent Fudge Frosting: The frosting is a luxurious addition that complements the cake perfectly, making every bite a chocolate lover’s dream.
- Versatile for Occasions: Whether for birthdays, holidays, or just a casual dessert, this cake is suitable for any occasion.
What Goes In
To make this sumptuous Chocolate Blackout Cake, you’ll need the following ingredients:
- 1 cup (250g) granulated sugar
- ½ cup (32g) cornstarch
- ½ teaspoon salt
- 2 cups (473.18ml) half-and-half
- 1 cup (244ml) whole milk
- 6 ounces (170.1g) unsweetened chocolate, finely chopped
- 2 teaspoons vanilla extract
- ½ cup (113.5g) unsalted butter
- 1 ½ cups (187.5g) all-purpose flour
- 2 teaspoons baking powder
- ½ teaspoon baking soda
- ½ teaspoon salt
- ¾ cup (64.5g) Dutch-processed cocoa powder
- 1 cup (237ml) brewed coffee
- 1 cup (240ml) buttermilk
- 1 cup (200g) granulated sugar
- 1 cup (220g) light brown sugar
- 2 eggs
- 1 teaspoon vanilla extract
Appliances & Accessories
Having the right tools can make the baking process smoother. Here’s what you’ll need:
- Stand mixer or hand mixer: For beating the batter and frosting.
- Mixing bowls: To combine your dry and wet ingredients.
- Measuring cups and spoons: Accurate measurements are key for baking success.
- Rubber spatula: Great for scraping down the sides of bowls.
- 9-inch round cake pans: For baking the cake layers.
- Cooling rack: To let the cakes cool properly before frosting.
- Offset spatula: For spreading frosting smoothly.
From Start to Finish: Chocolate Blackout Cake
Creating a Chocolate Blackout Cake involves several steps, but the end result is worth every moment. Here’s how to make it:
Step 1: Prepare Your Cake Pans
Preheat your oven to 350°F (175°C). Grease and flour two 9-inch round cake pans, ensuring they are ready for the batter.
Step 2: Melt the Chocolate
In a saucepan over low heat, combine the finely chopped unsweetened chocolate and half-and-half. Stir until completely melted and smooth. Remove from heat and let it cool slightly.
Step 3: Mix the Dry Ingredients
In a large mixing bowl, whisk together the all-purpose flour, granulated sugar, light brown sugar, baking powder, baking soda, salt, and Dutch-processed cocoa powder until well combined.
Step 4: Combine Wet Ingredients
In another bowl, mix together the brewed coffee, buttermilk, and 2 teaspoons of vanilla extract.
Step 5: Beat the Butter
In the bowl of your stand mixer, beat the unsalted butter until creamy. Gradually add the dry ingredients, alternating with the wet mixture, and then mix in the melted chocolate. Beat until just combined.
Step 6: Add Eggs
Add the eggs to the batter one at a time, making sure to mix well after each addition. Scrape down the sides of the bowl as needed.
Step 7: Bake the Cakes
Divide the batter evenly between the prepared cake pans. Bake in the preheated oven for 30-35 minutes or until a toothpick inserted in the center comes out clean. Let the cakes cool in the pans for 10 minutes before transferring them to a cooling rack.
Step 8: Prepare the Frosting
While the cake layers are cooling, prepare the frosting. In a saucepan, heat the remaining half-and-half and the chopped chocolate until melted and smooth. Remove from heat and let it cool slightly.
Step 9: Frost the Cake
Once the cakes are completely cooled, place one layer on a serving plate. Spread a generous amount of frosting on top, then place the second layer on top. Frost the top and sides of the cake with the remaining frosting.
Step 10: Serve and Enjoy
Slice the cake into generous portions and serve it up to family and friends. Watch as their eyes light up with delight!
Ingredient Swaps & Substitutions
If you’re looking to make substitutions, here are some ideas:
- For a dairy-free option, substitute the half-and-half and whole milk with almond or coconut milk, and use dairy-free butter.
- If you don’t have buttermilk, you can make a substitute by adding 1 tablespoon of vinegar or lemon juice to 1 cup of milk and letting it sit for 5 minutes.
- Replace unsweetened chocolate with an equal amount of dark chocolate if that’s what you have on hand.
- For a gluten-free version, use a 1:1 gluten-free flour blend in place of all-purpose flour.
Notes from the Test Kitchen
This Chocolate Blackout Cake is best enjoyed the day it’s made, but it can also be stored in the refrigerator for up to 3 days. Make sure to cover it well to maintain moisture. The flavor deepens even more after a day, making it an excellent make-ahead dessert.
- For easier slicing, use a hot knife to cut through the cake layers.
- Consider adding chocolate shavings or sprinkles on top for a decorative touch.
- If desired, add a layer of chocolate ganache between the cake layers for an extra touch of luxury.
Storing Tips & Timelines
To keep your Chocolate Blackout Cake fresh, follow these guidelines:
- Store leftover cake in an airtight container in the refrigerator for up to 3 days.
- If you want to freeze the cake, wrap it tightly in plastic wrap and then in aluminum foil. It can be frozen for up to 2 months.
- Thaw frozen cake in the refrigerator overnight before serving.
Quick Q&A
Can I make this cake ahead of time?
Yes! You can bake the cake layers a day in advance. Just wrap them tightly and store them at room temperature until you are ready to frost and serve.
Is there a way to make this cake less sweet?
If you prefer a less sweet cake, you can reduce the amount of granulated sugar in the batter by ¼ cup. Just be aware that this may affect the texture slightly.
Can I use different types of chocolate?
Absolutely! You can substitute the unsweetened chocolate with bittersweet chocolate for a sweeter cake, but keep in mind it will alter the overall flavor and sweetness.
What should I serve with Chocolate Blackout Cake?
This cake pairs beautifully with fresh berries, whipped cream, or a scoop of vanilla ice cream for a delightful contrast to the rich chocolate.
Before You Go
Creating a Chocolate Blackout Cake is not just about baking; it’s an experience that brings joy to those who create and savor it. Whether it’s a special occasion or a simple treat for yourself, this cake promises to deliver a chocolate explosion that is sure to please. Don’t hesitate to get creative with this recipe—add your unique spin or serve it alongside delightful accompaniments for an even more memorable dessert. Enjoy the process, savor every bite, and share the love of chocolate with those around you!
Chocolate Blackout Cake
Ingredients
- 1 cup granulated sugar
- ½ cup cornstarch
- ½ teaspoon salt
- 2 cups half-and-half
- 1 cup whole milk
- 6 ounces unsweetened chocolate, finely chopped
- 2 teaspoons vanilla extract
- ½ cup unsalted butter
- 1 ½ cups all-purpose flour
- 2 teaspoons baking powder
- ½ teaspoon baking soda
- ½ teaspoon salt
- ¾ cup Dutch-processed cocoa powder
- 1 cup brewed coffee
- 1 cup buttermilk
- 1 cup granulated sugar
- 1 cup light brown sugar
- 1 teaspoon vanilla extract
Instructions
- Preheat your oven to 350°F (175°C). Grease and flour two 9-inch round cake pans.
- In a saucepan over low heat, combine the finely chopped unsweetened chocolate and half-and-half. Stir until completely melted and smooth. Remove from heat and let it cool slightly.
- In a large mixing bowl, whisk together the all-purpose flour, granulated sugar, light brown sugar, baking powder, baking soda, salt, and Dutch-processed cocoa powder until well combined.
- In another bowl, mix together the brewed coffee, buttermilk, and 2 teaspoons of vanilla extract.
- In the bowl of your stand mixer, beat the unsalted butter until creamy. Gradually add the dry ingredients, alternating with the wet mixture, and then mix in the melted chocolate. Beat until just combined.
- Add the eggs to the batter one at a time, mixing well after each addition. Scrape down the sides of the bowl as needed.
- Divide the batter evenly between the prepared cake pans. Bake for 30-35 minutes or until a toothpick inserted in the center comes out clean. Let the cakes cool in the pans for 10 minutes before transferring them to a cooling rack.
- While the cake layers are cooling, prepare the frosting. In a saucepan, heat the remaining half-and-half and the chopped chocolate until melted and smooth. Remove from heat and let it cool slightly.
- Once the cakes are completely cooled, place one layer on a serving plate. Spread a generous amount of frosting on top, then place the second layer on top. Frost the top and sides of the cake with the remaining frosting.
- Slice the cake into generous portions and serve it up to family and friends.
Equipment
- Stand mixer or hand mixer
- Mixing Bowls
- Measuring cups and spoons
- Rubber Spatula
- 9-inch round cake pans
- Cooling rack
- Offset spatula
Notes
- For easier slicing, use a hot knife to cut through the cake layers.
- Consider adding chocolate shavings or sprinkles on top for a decorative touch.
- If desired, add a layer of chocolate ganache between the cake layers for an extra touch of luxury.


