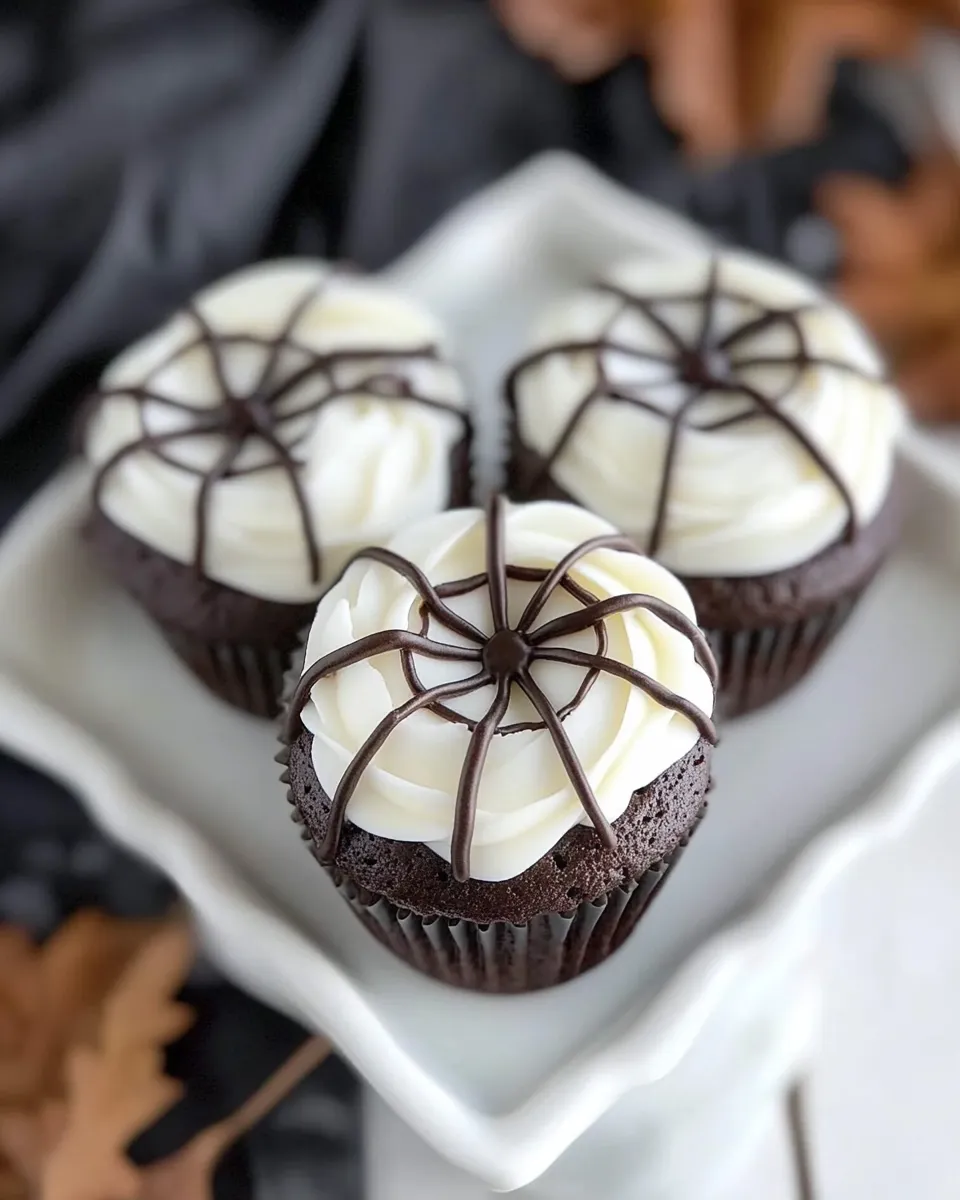
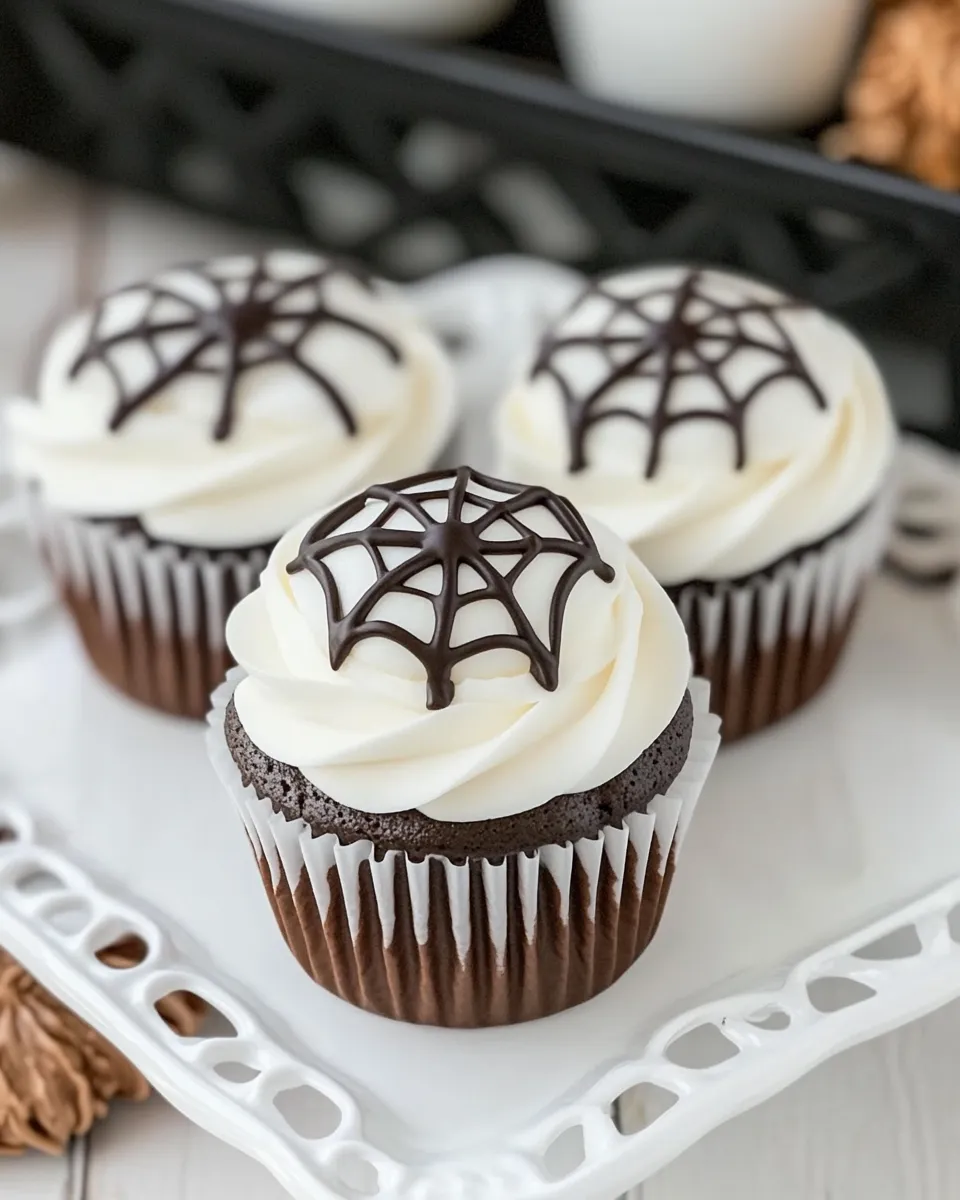
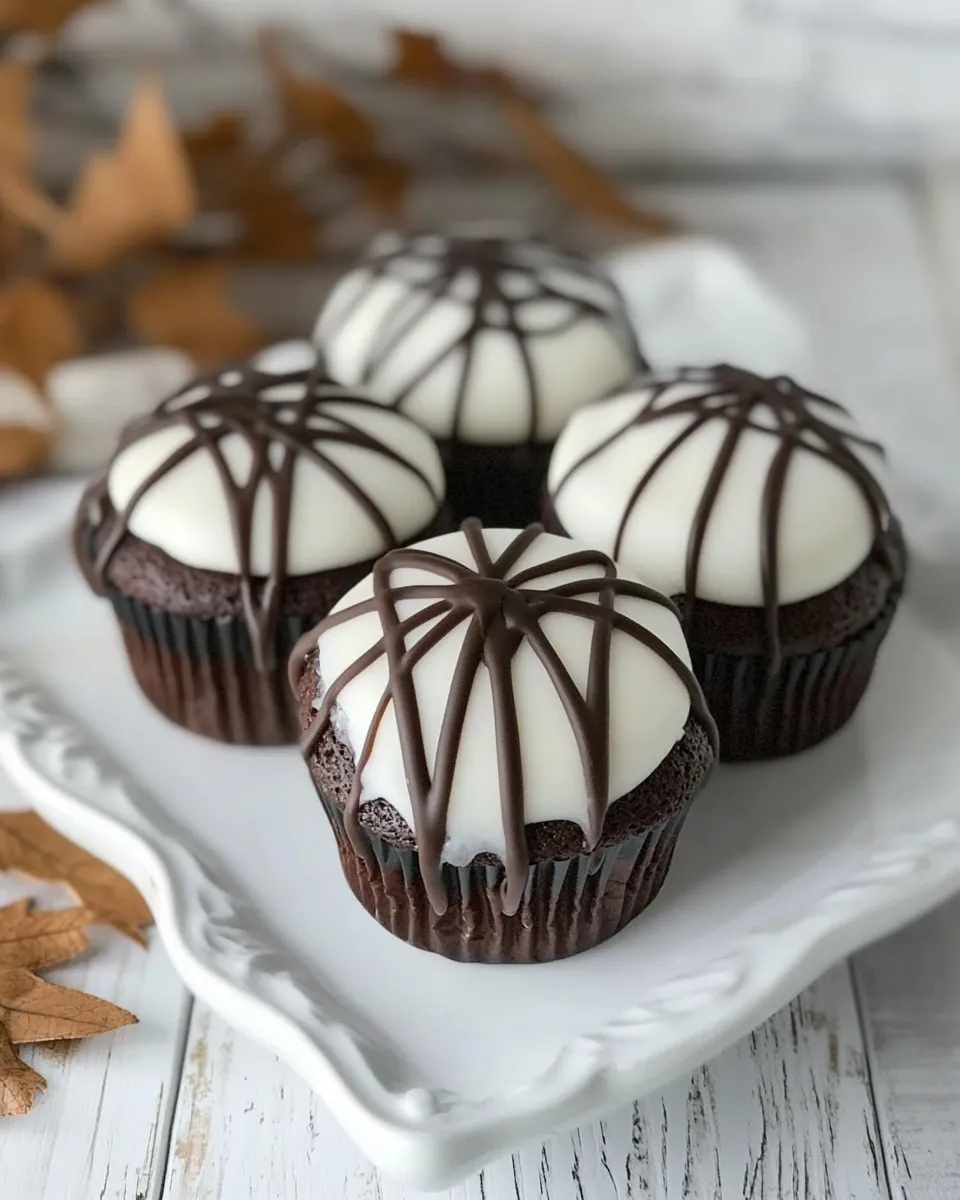
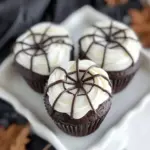
If you’re looking for a fun and spooky treat to impress your friends and family, look no further than these delightful Spiderweb Cupcakes! Perfectly moist and chocolatey, these cupcakes are topped with a creamy frosting that transforms into a charming spiderweb design with just a bit of piping magic. Whether for Halloween or any fun gathering, these cupcakes will surely be a hit!
What Makes This Recipe Special
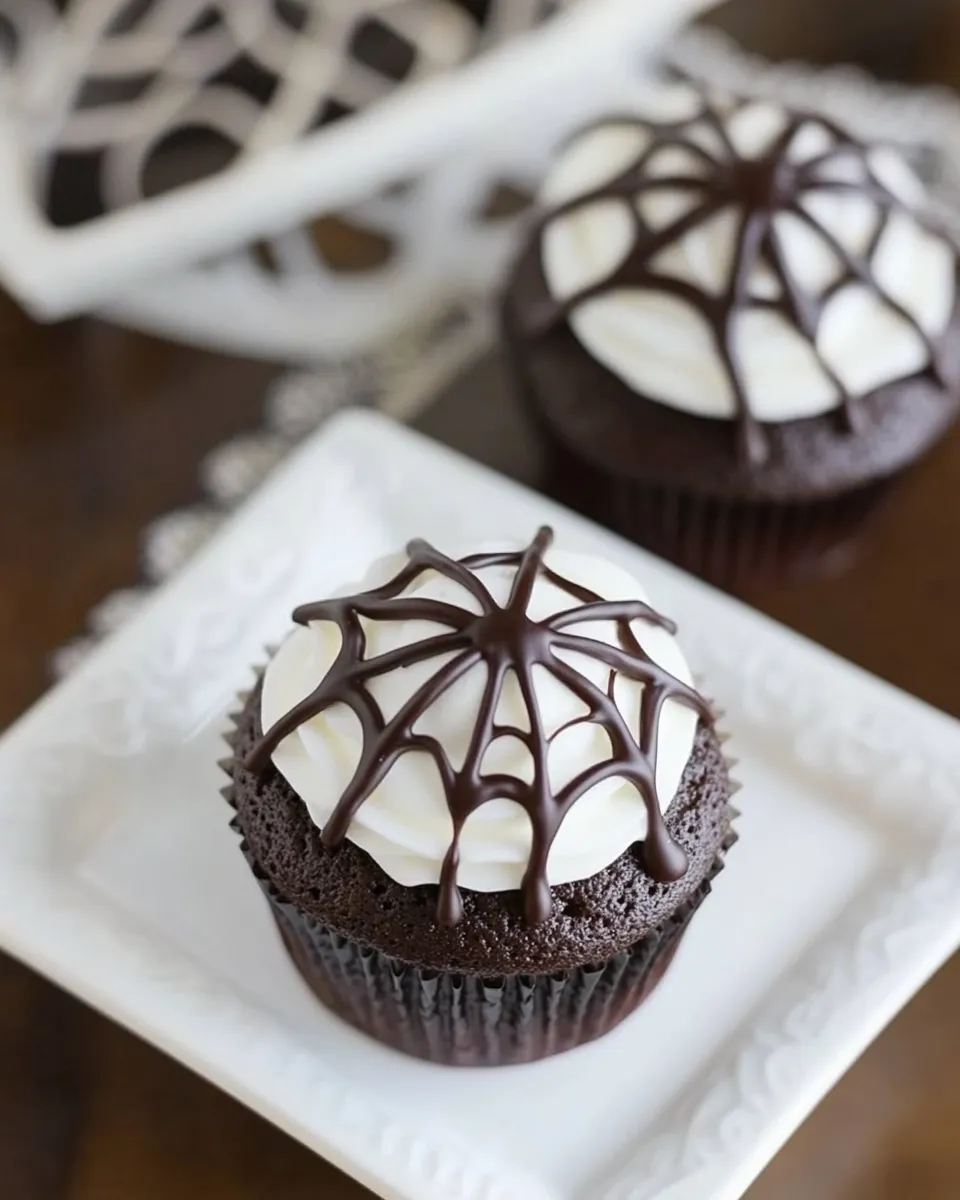
These Spiderweb Cupcakes stand out for their decadent chocolate flavor and whimsical design. The rich cocoa in the batter gives them an intense chocolatey goodness that pairs beautifully with the sweet frosting. Plus, the spiderweb decoration adds a playful touch, making them not only delicious but also visually appealing. This recipe combines simplicity with creativity, making it suitable for bakers of all skill levels.
What to Buy
To create these delightful cupcakes, you’ll need to gather a few key ingredients and tools. Here’s a handy list:
- 1 cup sugar – For sweetness and a moist texture.
- 1 cup plus 2 tablespoons flour – The base for our cupcakes.
- 1 cup plus 2 tablespoons cocoa powder – Ensures rich chocolate flavor.
- 1 teaspoon baking soda – Helps the cupcakes rise.
- 1 teaspoon baking powder – Additional leavening agent.
- 1/2 teaspoon salt – Balances sweetness.
- 1 egg – Binds everything together.
- 1 cup buttermilk or sour milk – Adds moisture and tenderness.
- 1 cup boiling water – Enhances the cocoa flavor.
- 1/2 cup vegetable oil – Keeps the cupcakes moist.
- 1 teaspoon vanilla extract – For added flavor.
What You’ll Need (Gear)
Before you get started, make sure you have the following tools on hand:
- Mixing bowls – For combining ingredients.
- Whisk – To mix the batter smoothly.
- Cupcake pan – To bake the cupcakes.
- Cupcake liners – For easy removal and decoration.
- Piping bag with a round tip – For creating the spiderweb design.
- Cooling rack – To cool the cupcakes before frosting.
How to Prepare Spiderweb Cupcakes
Follow these simple steps to create your own batch of Spiderweb Cupcakes:
Step 1: Preheat and Prepare
Preheat your oven to 350°F (175°C). Line your cupcake pan with cupcake liners to make removing the cupcakes easier once they’re baked.
Step 2: Combine Dry Ingredients
In a large mixing bowl, whisk together the sugar, flour, cocoa powder, baking soda, baking powder, and salt until well combined.
Step 3: Add Wet Ingredients
Add the egg, buttermilk (or sour milk), vegetable oil, and vanilla extract to the dry ingredients. Mix until just combined.
Step 4: Incorporate Boiling Water
Carefully stir in the boiling water until the batter is smooth. The batter will be quite thin, but that’s what makes the cupcakes moist!
Step 5: Fill Cupcake Liners
Pour the batter into the prepared cupcake liners, filling each about two-thirds full. This allows room for the cupcakes to rise without overflowing.
Step 6: Bake
Bake for 18-20 minutes or until a toothpick inserted into the center comes out clean. Let them cool in the pan for about 5 minutes before transferring them to a cooling rack to cool completely.
Step 7: Frosting Time
Once the cupcakes are cool, you can frost them with your favorite buttercream frosting. Make sure to leave some frosting aside for the spiderweb decoration.
Step 8: Create the Spiderweb Design
Using a piping bag with a round tip, pipe a circle of frosting in the center of each cupcake. Then, create concentric circles around the center. Finally, use a toothpick or a small knife to drag from the center to the outer edge, creating a spiderweb effect.
Year-Round Variations
These Spiderweb Cupcakes can easily be adapted for different occasions. Here are a few fun ideas:
- Use colored frosting for different holidays (green for St. Patrick’s Day, red and green for Christmas).
- Substitute the chocolate flavor with vanilla or lemon for a lighter twist.
- Incorporate candy spiders or gummy worms for an extra spooky touch.
- Add sprinkles or edible glitter for a festive touch.
Pro Tips & Notes
- Make sure all your ingredients are at room temperature for a smoother batter.
- Don’t overmix the batter; mix until just combined for the best texture.
- For an extra chocolatey flavor, you can add chocolate chips to the batter.
- Experiment with different piping techniques for the spiderweb design to find what you like best.
Storage Pro Tips
Store your Spiderweb Cupcakes in an airtight container at room temperature for up to 3 days. If you want to keep them fresh for longer, you can refrigerate them for up to a week. Just be sure to let them come to room temperature before serving. These cupcakes also freeze well; wrap them individually in plastic wrap and place them in a freezer-safe bag for up to 3 months.
Helpful Q&A
Can I make these cupcakes ahead of time?
Absolutely! You can bake the cupcakes a day or two in advance and store them in an airtight container. Frost them on the day you plan to serve them for the best texture.
Can I use a different frosting?
Yes! Feel free to use cream cheese frosting or a whipped ganache for a different flavor profile. Just ensure the frosting can hold the spiderweb design.
What if I don’t have buttermilk?
You can easily make a substitute by mixing 1 cup of milk with 1 tablespoon of vinegar or lemon juice. Let it sit for about 5-10 minutes, and it will be ready to use.
How can I make these cupcakes gluten-free?
For gluten-free Spiderweb Cupcakes, substitute all-purpose flour with a 1:1 gluten-free flour blend. Ensure that all other ingredients are also gluten-free.
Wrap-Up
These Spiderweb Cupcakes are not just a treat; they are an experience! They combine the joy of baking with the delight of creativity, making them perfect for any festive occasion. With their rich chocolate flavor and charming design, they are sure to bring a smile to anyone who tastes them. So gather your ingredients, unleash your inner baker, and get ready to whip up a batch of these whimsical delights. Enjoy the process and the delicious results!
Spiderweb Cupcakes
Ingredients
- 1 cup sugar
- 1 cup plus 2 tablespoons flour
- 1 cup plus 2 tablespoons cocoa powder
- 1 teaspoon baking soda
- 1 teaspoon baking powder
- 1/2 teaspoon salt
- 1 large egg
- 1 cup buttermilk or sour milk
- 1 cup boiling water
- 1/2 cup vegetable oil
- 1 teaspoon vanilla extract
Instructions
- Preheat your oven to 350°F (175°C). Line your cupcake pan with cupcake liners.
- In a large mixing bowl, whisk together the sugar, flour, cocoa powder, baking soda, baking powder, and salt until well combined.
- Add the egg, buttermilk (or sour milk), vegetable oil, and vanilla extract to the dry ingredients. Mix until just combined.
- Carefully stir in the boiling water until the batter is smooth.
- Pour the batter into the prepared cupcake liners, filling each about two-thirds full.
- Bake for 18-20 minutes or until a toothpick inserted into the center comes out clean. Let them cool in the pan for about 5 minutes before transferring them to a cooling rack.
- Once the cupcakes are cool, frost them with your favorite buttercream frosting, saving some for the spiderweb decoration.
- Using a piping bag, pipe a circle of frosting on each cupcake, then create concentric circles and drag from the center to the edges to create a spiderweb effect.
Equipment
- Mixing Bowls
- Whisk
- Cupcake Pan
- Cupcake liners
- Piping bag with a round tip
- Cooling rack
Notes
- Make sure all your ingredients are at room temperature for a smoother batter.
- Don’t overmix the batter; mix until just combined for the best texture.
- For an extra chocolatey flavor, you can add chocolate chips to the batter.