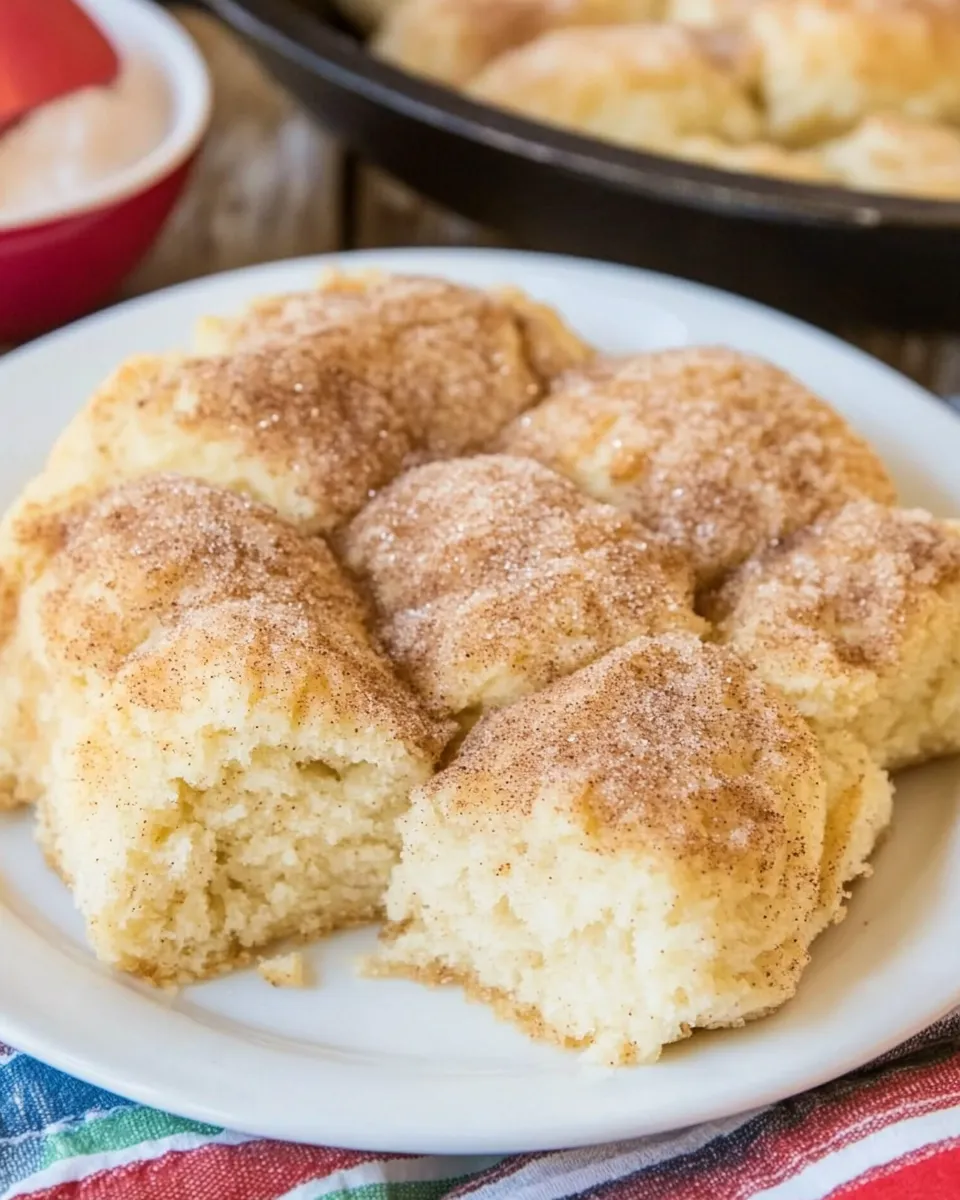
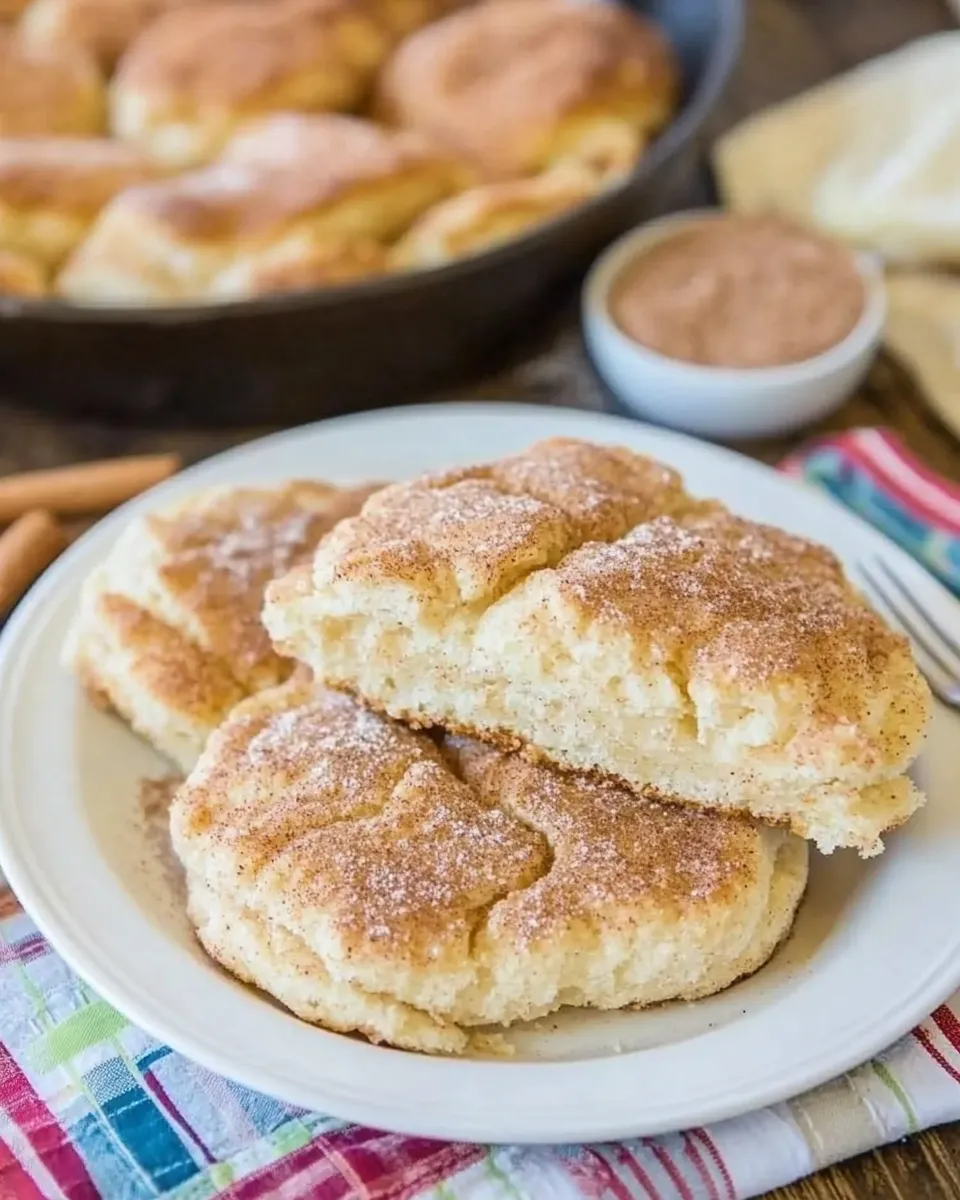
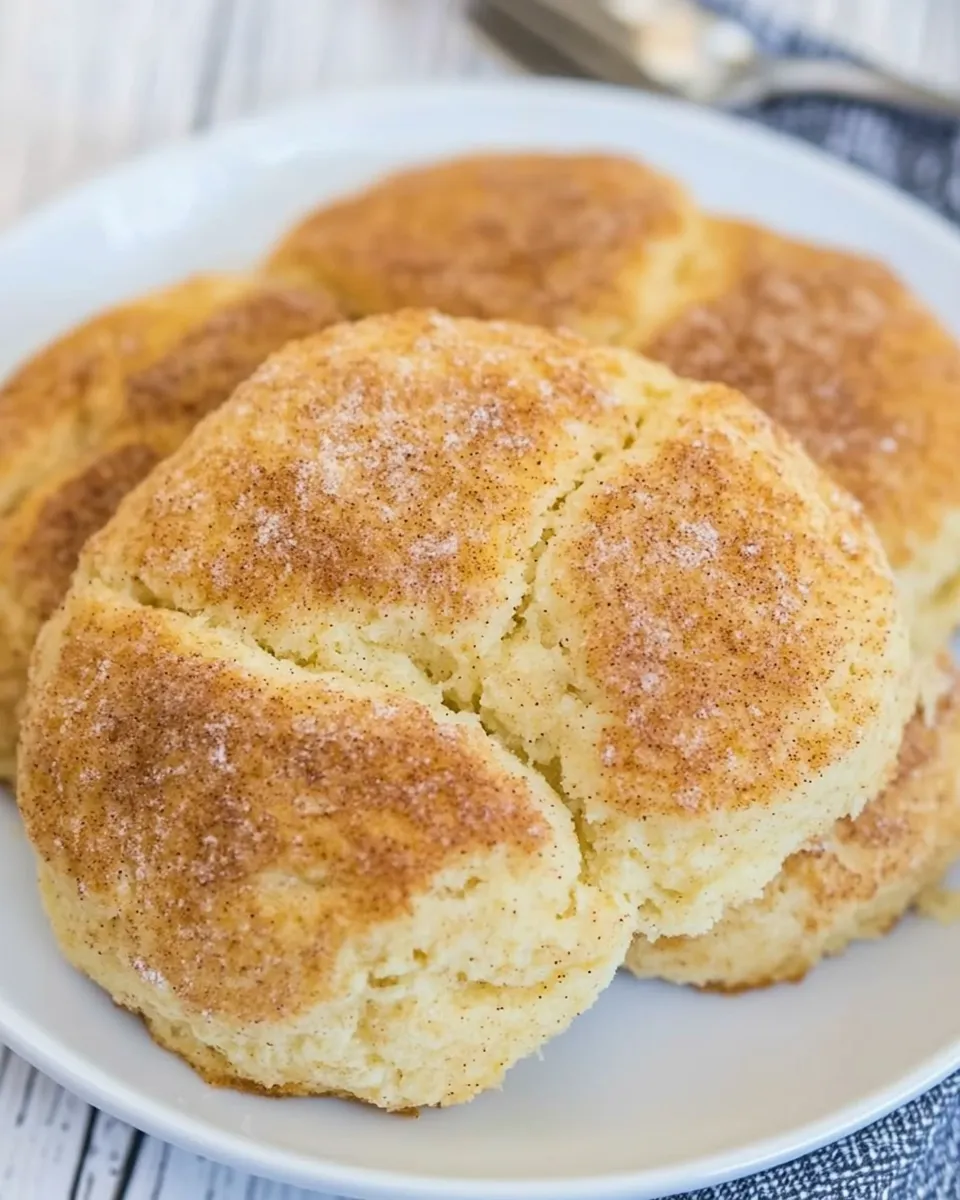
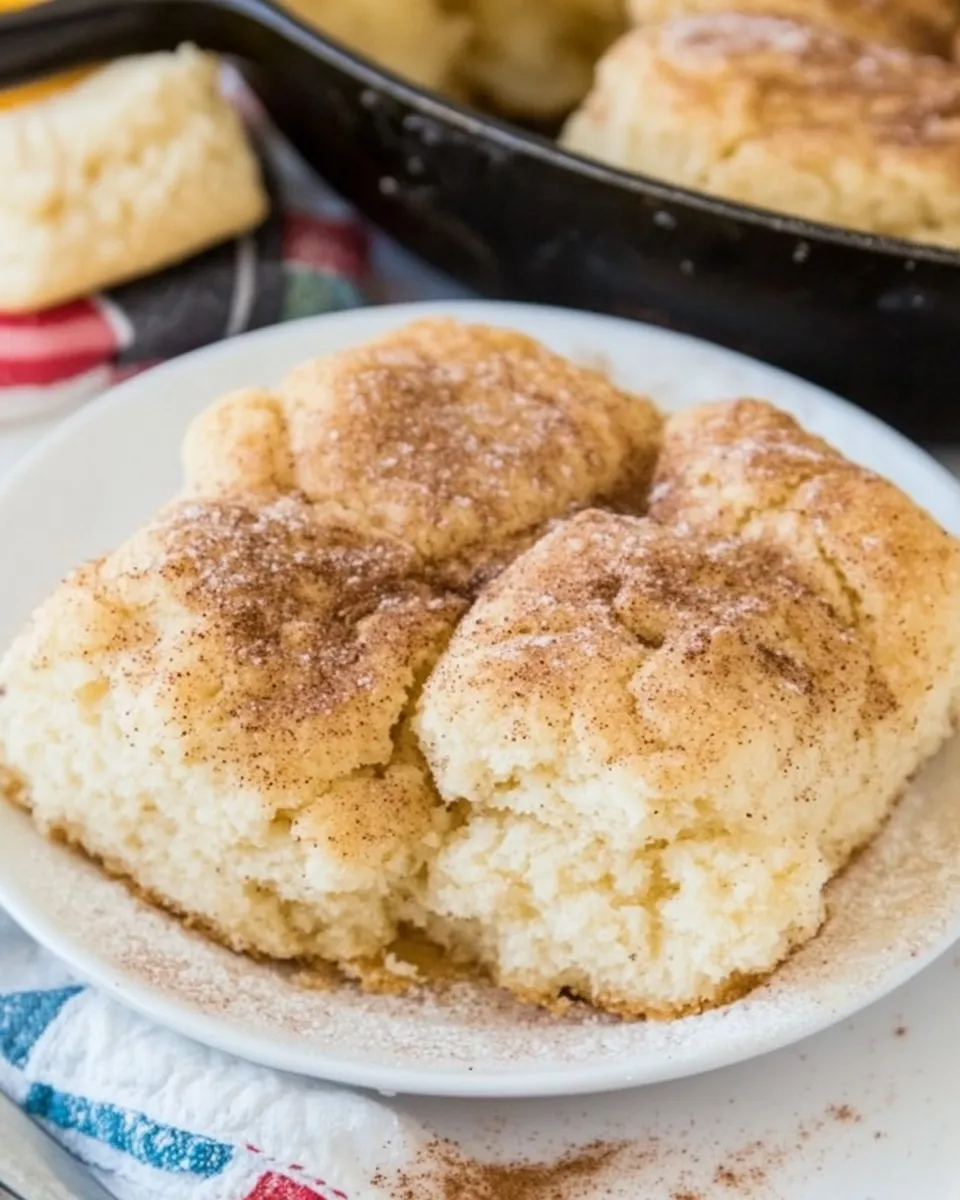
If you’re looking for a warm, comforting treat that brings together the best of both worlds—the fluffy texture of biscuits and the sweet, spicy goodness of classic snickerdoodles—then you’ve landed on the right recipe. These Skillet Snickerdoodle Biscuits are not only easy to make but also incredibly satisfying, perfect for a cozy breakfast or a delightful afternoon snack. With a crispy exterior and a soft, pillowy inside, they’re sure to be a hit with everyone at the table. Let’s dive into the details of making these scrumptious biscuits!
What You’ll Love About This Recipe
– The unique combination of biscuit texture and snickerdoodle flavor.
– Quick preparation time, so you can enjoy them fresh from the skillet in no time.
– The delightful aroma of cinnamon wafting through your kitchen as they bake.
– Perfect for breakfast, brunch, or a sweet treat any time of the day.
– Versatile enough to customize with your favorite mix-ins, like chocolate chips or nuts.
Ingredient List
- 3 ½ cups White Lily All-Purpose Flour
- 1 tablespoon baking powder
- ½ teaspoon baking soda
- ¾ teaspoon salt
- 1 tablespoon sugar
- 8 tablespoons butter, (1 stick), cut into cubes and softened
- 4 tablespoons shortening, cut into cubes
- 1 ⅓ cups buttermilk
- ¼ cup sugar (for rolling)
- 1 teaspoon cinnamon (for rolling)
- 1 tablespoon melted butter (for brushing)
Tools & Equipment Needed
- Skillet: A cast-iron skillet works best for even baking.
- Mixing bowls: For combining dry and wet ingredients.
- Whisk: To mix together the dry ingredients thoroughly.
- Rubber spatula: For folding the dough without overworking it.
- Measuring cups and spoons: For precise measurements of ingredients.
- Baking brush: For brushing melted butter on top before serving.
Skillet Snickerdoodle Biscuits in Steps
Step 1: Preheat the Skillet
Begin by placing your cast-iron skillet in the oven and preheating it to 450°F (232°C). This will ensure that the skillet is hot and ready for your biscuits.
Step 2: Mix Dry Ingredients
In a large mixing bowl, whisk together the 3 ½ cups of White Lily All-Purpose Flour, 1 tablespoon of baking powder, ½ teaspoon of baking soda, ¾ teaspoon of salt, and 1 tablespoon of sugar until fully combined.
Step 3: Incorporate Butter and Shortening
Add the 8 tablespoons of softened butter and 4 tablespoons of shortening to the dry mixture. Using a pastry cutter or your fingers, mix until the mixture resembles coarse crumbs.
Step 4: Add Buttermilk
Pour in 1 ⅓ cups of buttermilk and gently stir until just combined. Be careful not to overmix; a few lumps are perfectly fine.
Step 5: Prepare for Baking
Remove the hot skillet from the oven and lightly grease it with some butter. Using a spoon or your hands, drop spoonfuls of the biscuit dough into the skillet, leaving some space between each one.
Step 6: Roll in Cinnamon Sugar
In a small bowl, combine ¼ cup of sugar and 1 teaspoon of cinnamon. Sprinkle this mixture over the tops of the biscuits before placing them in the oven.
Step 7: Bake the Biscuits
Return the skillet to the oven and bake for about 15-18 minutes, or until the biscuits are golden brown and a toothpick inserted into the center comes out clean.
Step 8: Brush with Melted Butter
Once baked, remove the skillet from the oven and brush the tops of the biscuits with 1 tablespoon of melted butter for an extra layer of flavor and moisture.
Texture-Safe Substitutions
- Gluten-Free Flour: Use a 1-to-1 gluten-free baking flour for a gluten-free option.
- Plant-Based Butter: Substitute with a dairy-free butter for a vegan version.
- Non-Dairy Milk: Replace buttermilk with almond or soy milk mixed with a teaspoon of lemon juice or vinegar.
- Vegetable Oil: Use vegetable oil in place of shortening for a lighter biscuit.
Troubleshooting Tips
- If your biscuits are too dense, make sure not to overmix the dough.
- For a softer biscuit, use a little extra buttermilk.
- If the biscuits are browning too quickly, cover them loosely with aluminum foil during baking.
- Ensure your baking powder is fresh for the best rise.
Shelf Life & Storage
These Skillet Snickerdoodle Biscuits are best enjoyed fresh, but you can store leftovers in an airtight container at room temperature for up to 2 days. For longer storage, refrigerate for up to a week or freeze for up to a month. To reheat, simply pop them in the oven or microwave until warmed through.
Common Questions
Can I make the dough ahead of time?
Yes, you can prepare the dough and keep it covered in the refrigerator for up to 24 hours before baking. Just allow it to come to room temperature before baking for the best results.
What can I add to the biscuit dough?
You can add chocolate chips, chopped nuts, or even dried fruit to the dough for extra flavor and texture. Just be mindful not to add too much, as it may affect the biscuit’s rise.
Is there a way to make these healthier?
Absolutely! You can replace half of the all-purpose flour with whole wheat flour and reduce the sugar slightly for a healthier option.
Can I use a different type of sugar?
Yes, you can use brown sugar for a deeper flavor, or coconut sugar for a lower glycemic index alternative. Just keep in mind that this may slightly change the color and taste of the biscuits.
Final Thoughts
These Skillet Snickerdoodle Biscuits are not just a treat; they’re a delightful experience that combines the best of two beloved desserts. Whether you’re enjoying them fresh out of the skillet or saving them for later, each bite is sure to warm your heart and satisfy your sweet cravings. So gather your ingredients, preheat that skillet, and get ready to indulge in these irresistible biscuits that are perfect for any occasion. Happy baking!

Skillet Snickerdoodle Biscuits
Ingredients
- 3 ½ cups White Lily All-Purpose Flour
- 1 tablespoon baking powder
- ½ teaspoon baking soda
- ¾ teaspoon salt
- 1 tablespoon sugar
- 8 tablespoons butter (1 stick), cut into cubes and softened
- 4 tablespoons shortening cut into cubes
- 1 ⅓ cups buttermilk
- ¼ cup sugar (for rolling)
- 1 teaspoon cinnamon (for rolling)
- 1 tablespoon melted butter (for brushing)
Instructions
- Preheat your cast-iron skillet in the oven at 450°F (232°C).
- In a large bowl, whisk together the flour, baking powder, baking soda, salt, and sugar until combined.
- Add the softened butter and shortening, mixing until the mixture resembles coarse crumbs.
- Pour in the buttermilk and gently stir until just combined; a few lumps are fine.
- Remove the hot skillet and grease it lightly with butter. Drop spoonfuls of the dough into the skillet, leaving space between them.
- In a small bowl, mix the sugar and cinnamon, then sprinkle over the biscuit tops.
- Bake for 15-18 minutes, until golden brown and a toothpick comes out clean.
- Brush the tops with melted butter after baking for added flavor.
Equipment
- Cast-Iron Skillet
- Mixing Bowls
- Whisk
- Rubber Spatula
- Measuring cups and spoons
- Baking Brush
Notes
- Store leftovers in an airtight container for up to 2 days.
- For a gluten-free option, use a 1-to-1 gluten-free baking flour.
- You can customize with chocolate chips or nuts for extra flavor!