
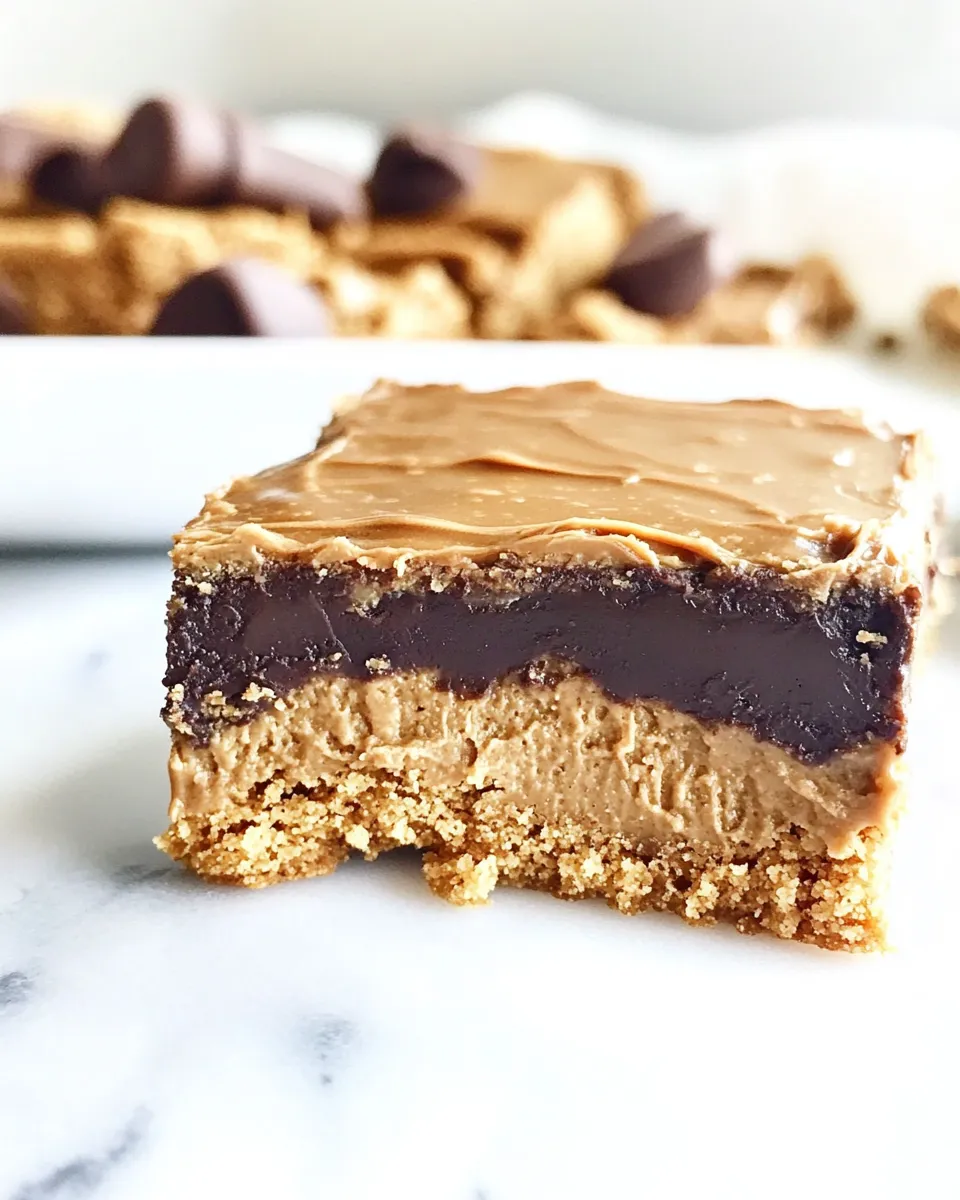
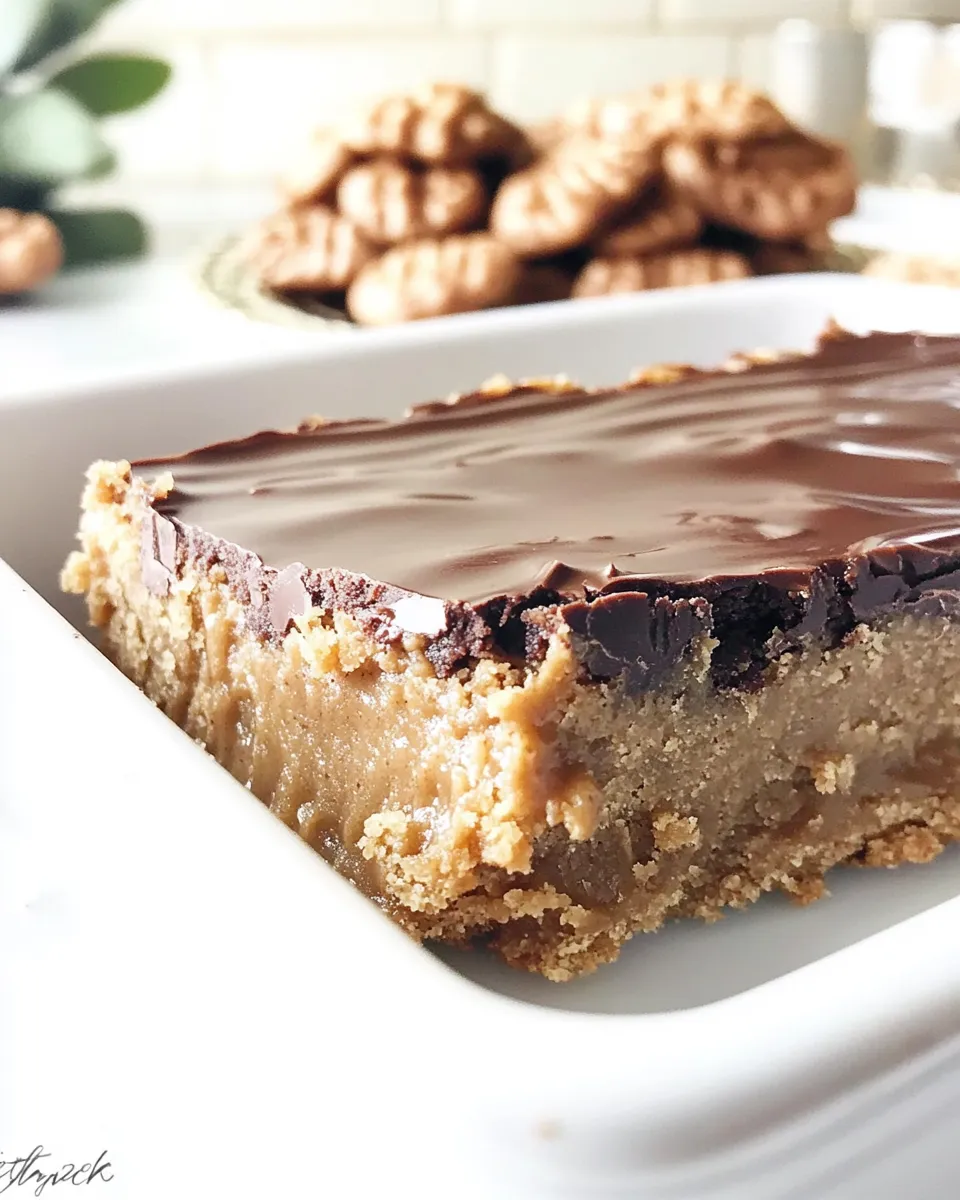
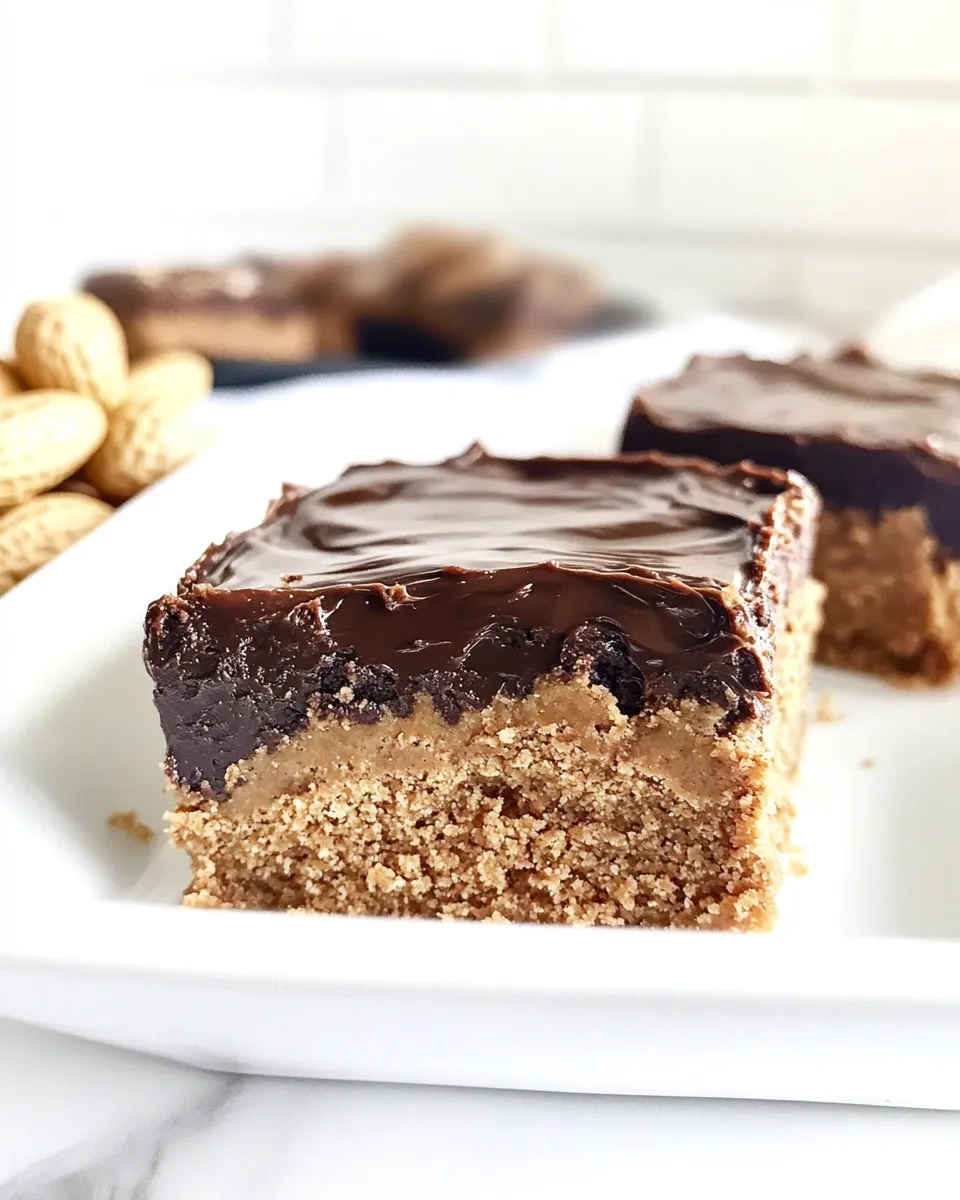
If you’re in the mood for a dessert that combines the rich, nutty flavor of peanut butter with the sweet crunch of Butterfinger, then you’ve stumbled upon a true gem! These Peanut Butter Cookie Bars with Butterfinger Chocolate Frosting are not only easy to whip up but also deliver a delightful balance of textures and flavors that will have everyone coming back for seconds. Imagine a chewy, peanut buttery base topped with a creamy, chocolatey frosting filled with bits of Butterfinger candy. It’s a treat that’s perfect for parties, family gatherings, or even just a cozy night in. Let’s dive into this delicious recipe!
Why Cooks Rave About It

There’s something magical about the combination of peanut butter and chocolate, and when you add Butterfinger into the mix, it elevates the dessert to another level. The chewy cookie base is simple yet satisfying, while the frosting brings a rich, decadent touch that makes these bars irresistible. Beyond the taste, this recipe is straightforward, making it ideal for both novice bakers and seasoned pros. Plus, who wouldn’t want to enjoy a dessert that’s as easy to make as it is delicious?
Ingredient Notes
- Brown Sugar: Adds moisture and a deep flavor to the cookie base.
- Granulated Sugar: Balances the sweetness and contributes to the cookie’s texture.
- Butter: Provides richness; make sure it’s softened for easy mixing.
- Crunchy Peanut Butter: For texture and a robust peanut flavor.
- Eggs: Essential for binding and moisture.
- Vanilla Extract: Enhances the overall flavor profile.
- All-Purpose Flour: The foundation of the cookie dough.
- Quick Oats: Adds chewiness and a wholesome element.
- Baking Soda & Baking Powder: Helps the bars rise and remain soft.
- Salt: Balances sweetness and enhances flavors.
- Cinnamon: A hint of warmth that complements the peanut butter.
- Smooth Peanut Butter: For a creamy, luscious frosting.
- Cocoa Powder: Adds chocolate depth to the frosting.
- Butterfinger Bars: Crushed for both the frosting and as a topping – the star of the show!
- Powdered Sugar: Sweetens the frosting and gives it a smooth texture.
- Evaporated Milk: Helps achieve the right consistency for the frosting.
Gear Checklist
- Mixing Bowls: For combining ingredients.
- Electric Mixer: Makes the mixing process effortless.
- Measuring Cups and Spoons: Essential for accurate ingredient measurement.
- Baking Pan: A 9×13 inch pan works best for these bars.
- Spatula: For spreading the batter and frosting evenly.
- Food Processor: Perfect for crushing Butterfinger bars smoothly.
The Method for Peanut Butter Cookie Bars with Butterfinger Chocolate Frosting
Step 1: Preheat the Oven
Preheat your oven to 350°F (175°C). Grease or line a 9×13 inch baking pan with parchment paper for easy removal.
Step 2: Mix the Wet Ingredients
In a large mixing bowl, cream together 1 cup of brown sugar, 1 cup of granulated sugar, and 1 cup (2 sticks) of softened butter until light and fluffy. Add in ½ cup of crunchy peanut butter, 2 eggs, and 2 teaspoons of vanilla extract, mixing until well combined.
Step 3: Combine the Dry Ingredients
In another bowl, whisk together 2 cups of all-purpose flour, 2 cups of quick oats, 1 teaspoon of baking soda, ½ teaspoon of baking powder, ½ teaspoon of salt, and 1 teaspoon of ground cinnamon.
Step 4: Combine Wet and Dry Ingredients
Gradually add the dry mixture into the wet mixture, stirring until just combined. Be careful not to overmix; we want these bars to stay soft and chewy.
Step 5: Bake the Cookie Base
Spread the batter evenly into the prepared baking pan. Bake for 20-25 minutes or until the edges are lightly golden and a toothpick inserted into the center comes out clean. Allow the bars to cool completely in the pan on a wire rack.
Step 6: Prepare the Butterfinger Chocolate Frosting
While the bars cool, make the frosting. In a medium bowl, beat together 1 cup of smooth peanut butter and ½ cup of butter until creamy. Gradually mix in ½ cup of unsweetened cocoa powder and 2 cups of sifted powdered sugar. Add ½ teaspoon of vanilla extract and ⅓ cup of evaporated milk, mixing until smooth. If the frosting is too thick, add more evaporated milk, a teaspoon at a time, until the desired consistency is reached.
Step 7: Add Butterfinger Crunch
Fold in the 23.7 oz. of finely crushed Butterfinger bars into the frosting mixture, ensuring even distribution.
Step 8: Frost the Cookie Bars
Once the cookie base is completely cool, spread the Butterfinger chocolate frosting evenly over the top. Top with additional crushed Butterfinger bars for that extra crunch and flavor.
Step 9: Cut and Serve
Allow the bars to set for about 30 minutes before cutting them into squares. Serve and enjoy the delightful combination of peanut butter and Butterfinger goodness!
Tailor It to Your Diet
- Vegan Option: Substitute the butter with plant-based butter and use flax eggs (1 tablespoon of ground flaxseed mixed with 2.5 tablespoons of water equals one egg).
- Gluten-Free: Swap all-purpose flour with a gluten-free flour blend.
- Lower Sugar: Use less sugar or a sugar substitute suitable for baking.
- Nut-Free: Replace peanut butter with sun butter or another seed butter.
Steer Clear of These
To ensure the best results for your Peanut Butter Cookie Bars with Butterfinger Chocolate Frosting, avoid the following:
- Using natural peanut butter that separates – it can affect the texture of the bars.
- Overbaking the cookie base, as it can become dry and crumbly.
- Using cold butter, which can lead to a dense cookie.
- Skipping the cooling time for the bars before frosting; this helps prevent the frosting from melting.
Storage & Reheat Guide
Store any leftovers in an airtight container at room temperature for up to 3 days. For longer storage, you can refrigerate them for up to a week. If you’d like to freeze them, wrap the bars tightly in plastic wrap and then in foil to prevent freezer burn. They can be frozen for up to 3 months. To reheat, simply microwave for a few seconds until warm, or enjoy them cold for a satisfying treat.
Quick Q&A
Can I use smooth peanut butter in the cookie base instead of crunchy?
Yes, you can use smooth peanut butter, but the bars will be less textured. Crunchy peanut butter adds a delightful crunch that enhances the eating experience.
How do I know when the cookie bars are done baking?
The edges should be lightly golden, and a toothpick inserted into the center should come out clean or with a few moist crumbs. Be careful not to overbake!
Can I substitute Butterfinger with another candy?
Absolutely! Feel free to experiment with other candies like Snickers, Reese’s, or even crushed Oreos for a different flavor profile.
Is there a way to make these bars healthier?
You can reduce the sugar content, replace some of the butter with unsweetened applesauce, or use whole grain oats for added fiber and nutrients.
Time to Try It
Now that you have all the tools and tips for making these scrumptious Peanut Butter Cookie Bars with Butterfinger Chocolate Frosting, it’s time to roll up your sleeves and get baking! Whether you’re treating yourself or impressing friends and family, these bars will surely be the highlight of any dessert table. So gather your ingredients, follow the steps, and indulge in this delightful treat. Happy baking!
Peanut Butter Cookie Bars with Butterfinger Chocolate Frosting
Ingredients
For the Cookie Base:
- 1 cup Brown Sugar
- 1 cup Granulated Sugar
- 1 cup Butter softened
- ½ cup Crunchy Peanut Butter
- 2 large Eggs
- 2 teaspoons Vanilla Extract
- 2 cups All-Purpose Flour
- 2 cups Quick Oats
- 1 teaspoon Baking Soda
- ½ teaspoon Baking Powder
- ½ teaspoon Salt
- 1 teaspoon Ground Cinnamon
For the Butterfinger Frosting:
- 1 cup Smooth Peanut Butter
- ½ cup Butter
- ½ cup Unsweetened Cocoa Powder
- 2 cups Powdered Sugar sifted
- ½ teaspoon Vanilla Extract
- ⅓ cup Evaporated Milk
- 23.7 oz Butterfinger Bars finely crushed
Instructions
Instructions:
- Step 1: Preheat the Oven - Preheat your oven to 350°F (175°C). Grease or line a 9x13 inch baking pan with parchment paper for easy removal.
- Step 2: Mix the Wet Ingredients - In a large mixing bowl, cream together brown sugar, granulated sugar, and softened butter until light and fluffy. Add in crunchy peanut butter, eggs, and vanilla extract, mixing until well combined.
- Step 3: Combine the Dry Ingredients - In another bowl, whisk together all-purpose flour, quick oats, baking soda, baking powder, salt, and ground cinnamon.
- Step 4: Combine Wet and Dry Ingredients - Gradually add the dry mixture into the wet mixture, stirring until just combined. Be careful not to overmix.
- Step 5: Bake the Cookie Base - Spread the batter evenly into the prepared baking pan. Bake for 20-25 minutes or until the edges are lightly golden. Allow the bars to cool completely in the pan on a wire rack.
- Step 6: Prepare the Butterfinger Chocolate Frosting - In a medium bowl, beat together smooth peanut butter and butter until creamy. Gradually mix in cocoa powder and powdered sugar. Add vanilla extract and evaporated milk, mixing until smooth.
- Step 7: Add Butterfinger Crunch - Fold in finely crushed Butterfinger bars into the frosting mixture, ensuring even distribution.
- Step 8: Frost the Cookie Bars - Once the cookie base is completely cool, spread the Butterfinger chocolate frosting evenly over the top. Top with additional crushed Butterfinger bars.
- Step 9: Cut and Serve - Allow the bars to set for about 30 minutes before cutting them into squares. Serve and enjoy!
Equipment
- Mixing Bowls
- Electric Mixer
- Measuring cups and spoons
- Baking Pan
- Spatula
- Food Processor
Notes
- Store leftovers in an airtight container at room temperature for up to 3 days.
- For longer storage, refrigerate for up to a week.
- Wrap bars tightly in plastic and foil to freeze for up to 3 months.


