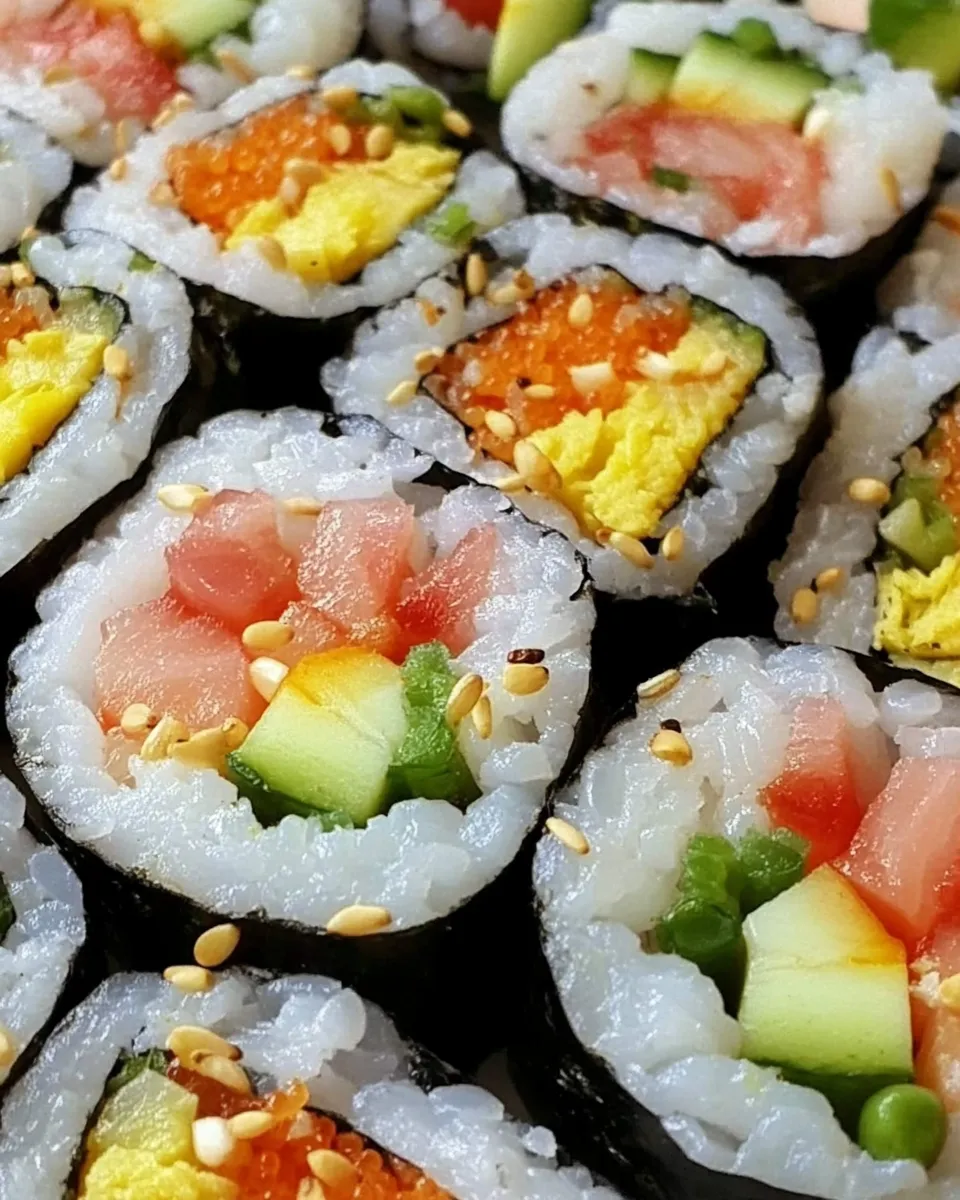
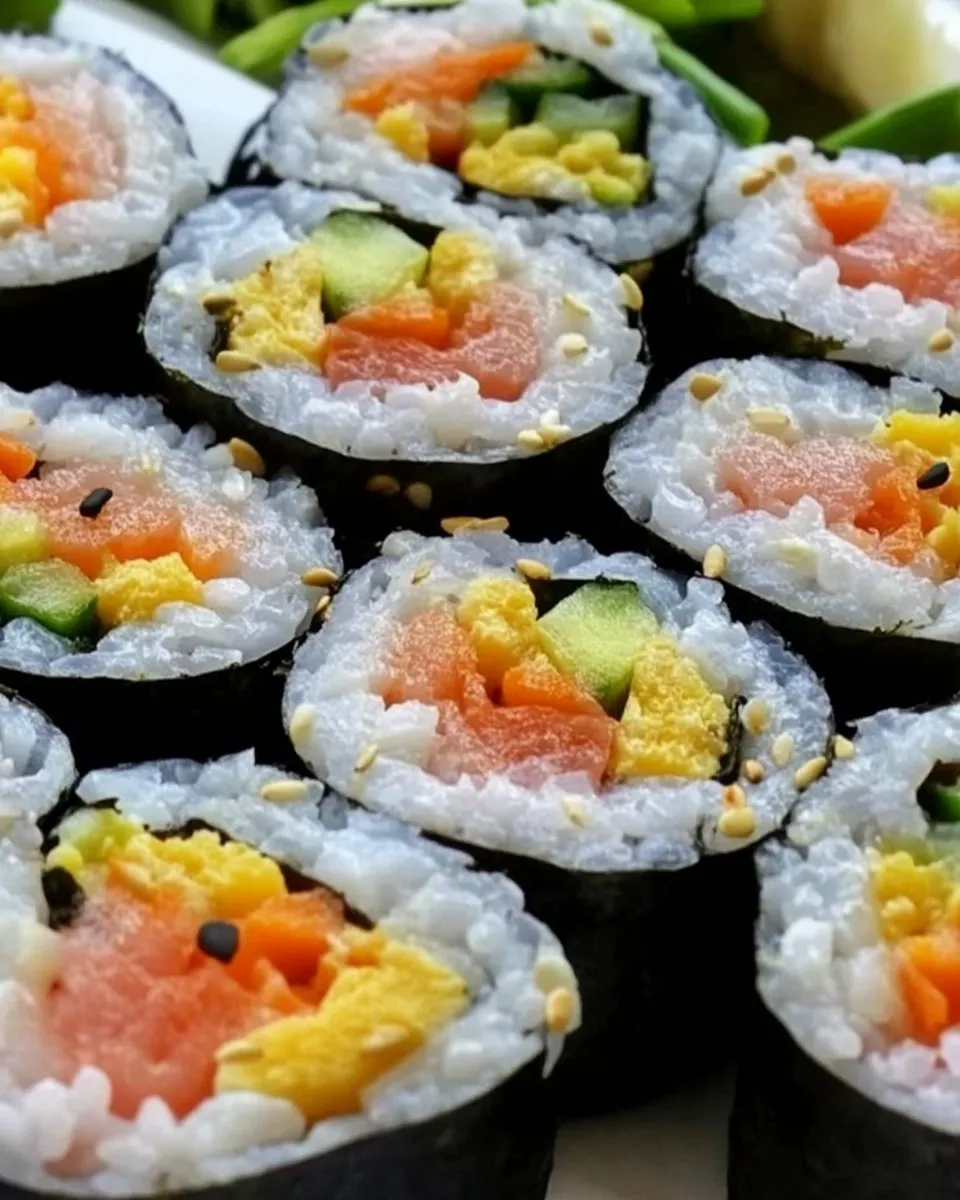
Are you ready to roll into the world of Keto Sushi? This delightful dish is not only a feast for the eyes but also a fantastic low-carb option that satisfies sushi cravings without the guilt. With a cauliflower base instead of traditional rice, you can indulge in sushi while sticking to your keto lifestyle. Let’s dive into the deliciousness that is Keto Sushi!
Why It’s Crowd-Pleasing
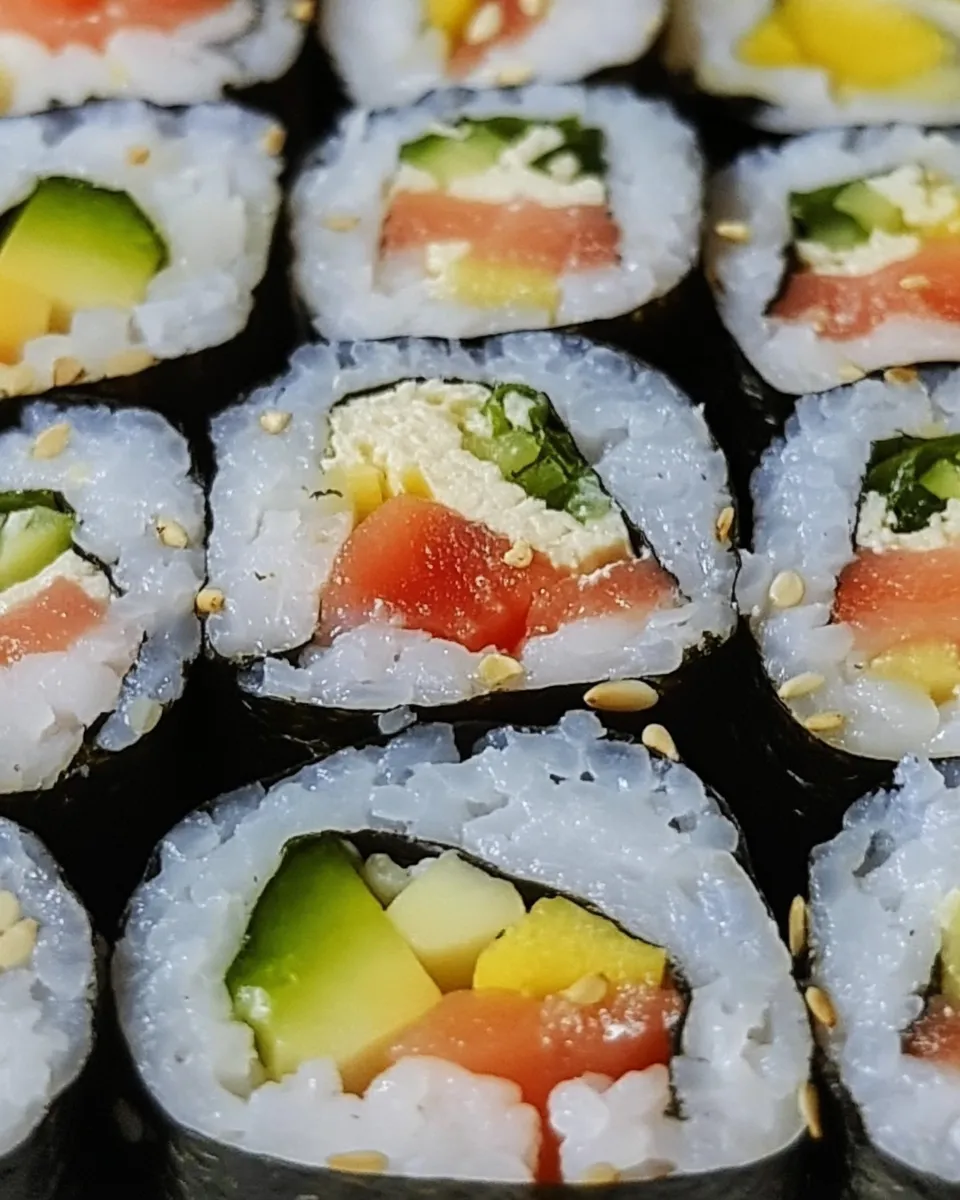
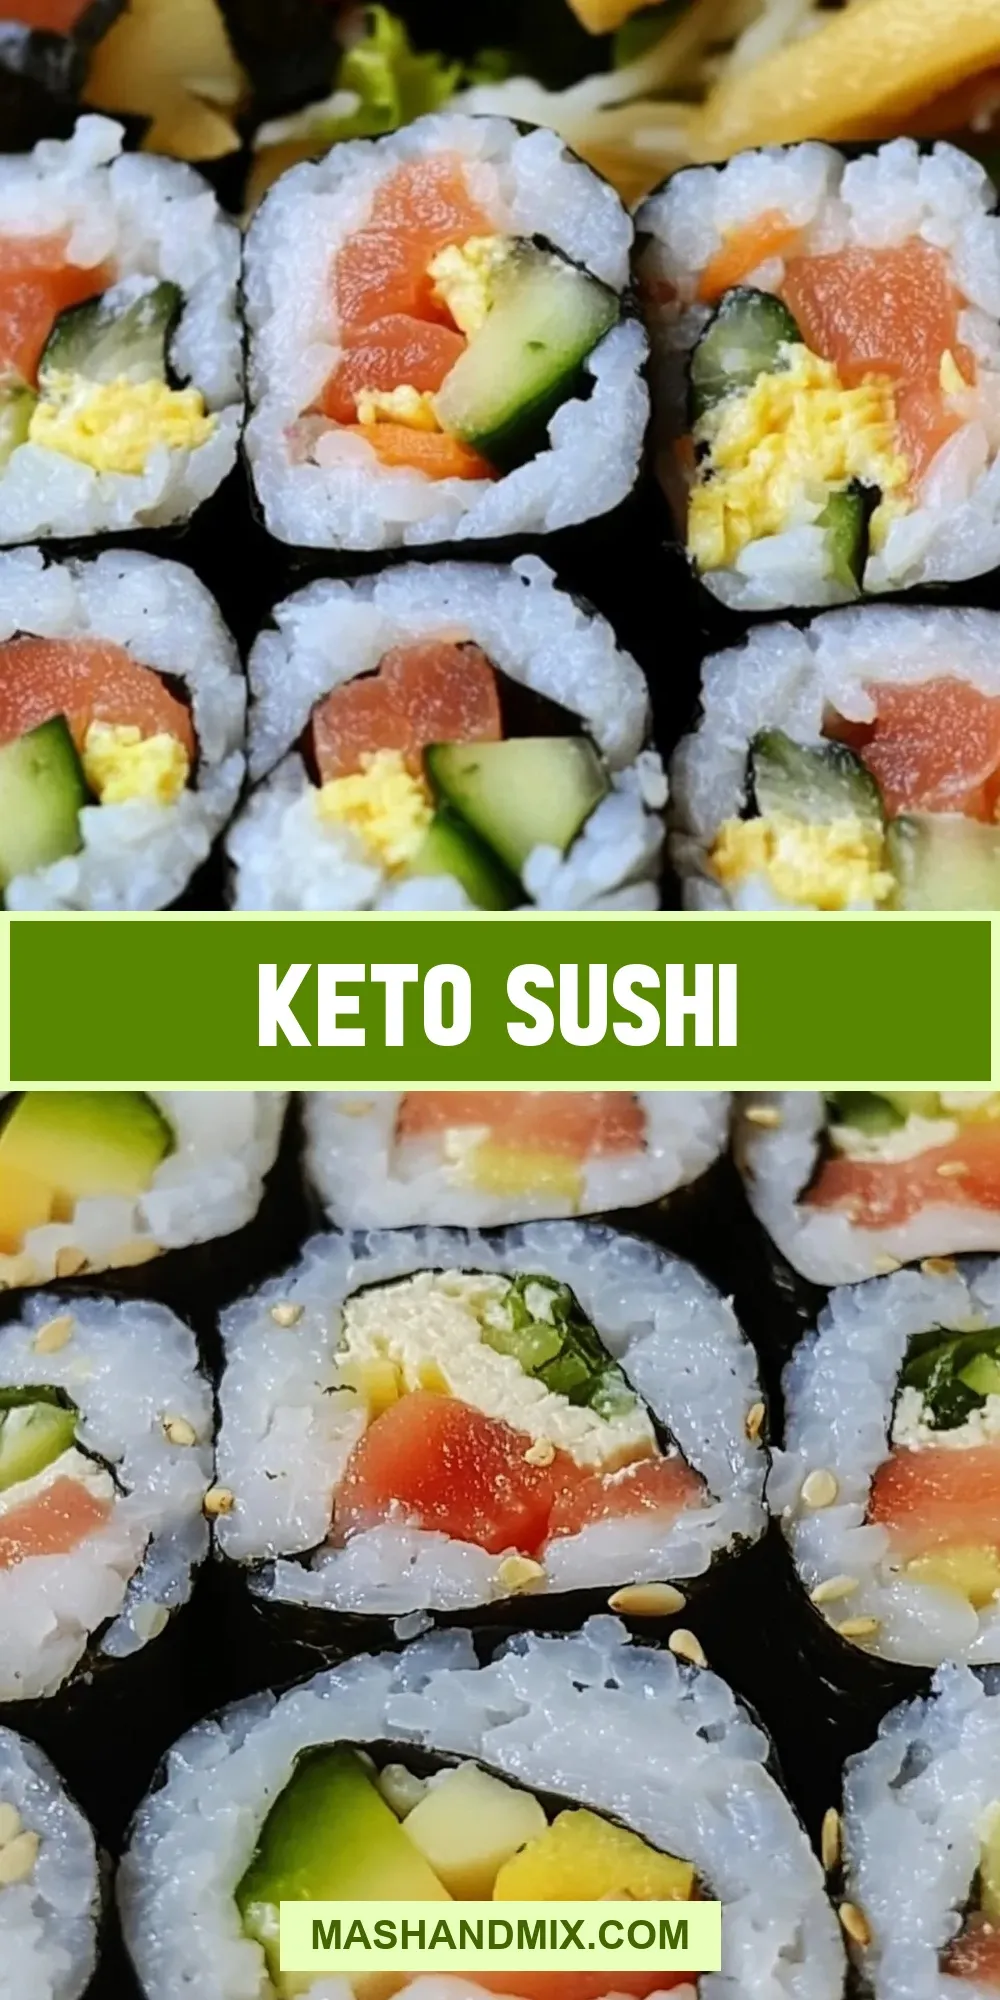
Keto Sushi is a hit for several reasons. First, it’s visually stunning, showcasing vibrant colors and textures that make it an attractive dish for gatherings. Second, it’s incredibly versatile—whether you’re a fan of salmon, tuna, or even veggies, you can customize it to your liking. Finally, it’s a healthier alternative to traditional sushi, making it a great option for those watching their carbohydrate intake. Serve it at your next dinner party, and watch your friends and family rave about this innovative take on a beloved classic!
What We’re Using
To create this Keto Sushi, we’ll need a few key ingredients that come together beautifully. Here’s what you’ll need:
- 4 cups cauliflower florets, chopped – approximately half a large cauliflower, this will be the base of our sushi.
- 1/2 teaspoon salt – to season the cauliflower rice.
- 1 tablespoon white vinegar – adds a tangy flavor to the rice.
- 2 tablespoons sugar-free powdered sugar – to mimic the sweetness of traditional sushi rice.
- 2 sheets Nori – essential for wrapping the sushi.
- 2 tablespoons mayonnaise – for a creamy texture.
- 1/4 cup sushi-grade salmon or protein of choice – a delicious filling.
- 1/2 small cucumber, sliced into strips – for crunch.
- 1/8 teaspoon sesame seeds – for garnish.
- 1 serving wasabi (optional) – for that extra kick!
Kitchen Gear Checklist
Before we get started, make sure you have the right tools on hand:
- Food Processor – to easily chop the cauliflower into rice-size pieces.
- Steamer or Microwave – for cooking the cauliflower.
- Mixing Bowl – for combining ingredients.
- Rolling Mat – to help shape the sushi rolls perfectly.
- Sharp Knife – for cutting the sushi into bite-sized pieces.
Stepwise Method: Keto Sushi
Let’s get rolling with this Keto Sushi recipe! Follow these simple steps to create your own sushi masterpiece.
Step 1: Prepare the Cauliflower Rice
Start by chopping the cauliflower into florets. Use a food processor to pulse the florets until they resemble rice grains. This should yield about 4 cups of cauliflower rice.
Step 2: Cook the Cauliflower
Transfer the cauliflower rice to a steamer or microwave-safe bowl. Steam it for about 5-7 minutes or until tender. Once cooked, let it cool slightly.
Step 3: Season the Cauliflower Rice
In a mixing bowl, combine the cooked cauliflower rice with salt, white vinegar, and sugar-free powdered sugar. Mix well until all the ingredients are evenly distributed.
Step 4: Prepare the Nori
Lay a sheet of nori on a bamboo rolling mat, shiny side down. Make sure it’s placed horizontally in front of you.
Step 5: Spread the Cauliflower Rice
With wet hands (to prevent sticking), take a handful of the cauliflower rice mixture and spread it evenly over the nori, leaving about an inch of space at the top.
Step 6: Add Fillings
In the center of the rice, place a line of the mayonnaise, followed by your choice of sushi-grade salmon (or other protein) and cucumber strips.
Step 7: Roll the Sushi
Starting from the bottom, use the bamboo mat to gently roll the sushi away from you, applying slight pressure to ensure it holds together. Roll it tightly, stopping when you reach the open edge of the nori.
Step 8: Seal the Roll
Use a little water to moisten the edge of the nori, then press it down to seal the roll.
Step 9: Slice and Serve
With a sharp knife, slice the roll into bite-sized pieces. Sprinkle with sesame seeds for garnish. Serve with wasabi on the side for an extra kick!
What to Use Instead
If you’re looking to switch things up or have dietary restrictions, consider these alternatives:
- Cauliflower Rice – can be swapped with other low-carb options like zucchini noodles.
- Sushi-grade salmon – can be replaced with cooked shrimp, crab, or tofu for a vegetarian option.
- Mayonnaise – try avocado for a creamier texture and added health benefits.
- Nori – if unavailable, you can use lettuce leaves to wrap your sushi.
What Could Go Wrong
While making Keto Sushi is quite straightforward, a few hiccups could occur:
- Too much water in the cauliflower can make the sushi soggy. Ensure to drain it well after cooking.
- Rolling too tightly might cause the nori to tear. Be gentle but firm when rolling.
- Not using enough salt or vinegar can result in bland flavors. Don’t skip the seasoning!
Meal Prep & Storage Notes
Keto Sushi is best enjoyed fresh, but if you want to prep it in advance, here are some tips:
Store the prepared sushi rolls in an airtight container in the refrigerator for up to 24 hours. If you plan to eat them later, keep the ingredients separate and assemble just before serving to maintain freshness. The cauliflower rice can also be made ahead of time and stored in the fridge for up to three days.
FAQ
Can I make Keto Sushi vegetarian?
Absolutely! You can fill your sushi with an array of vegetables such as avocado, bell peppers, and carrots, or use tofu as a protein alternative.
Is this Keto Sushi gluten-free?
This Keto Sushi is gluten-free as long as you use gluten-free mayonnaise and ensure your fillings do not contain gluten.
Can I freeze Keto Sushi?
While it’s not recommended to freeze sushi, you can freeze the cauliflower rice before assembling the rolls. Just make sure to defrost it and drain any excess moisture before use.
What else can I serve with Keto Sushi?
Keto Sushi pairs wonderfully with a side of Quick Sesame Ginger Chicken Lettuce Wraps for a complete meal. You can also serve it with a homemade dipping sauce using soy sauce or coconut aminos.
Next Steps
Now that you’ve mastered the art of Keto Sushi, why not experiment with different fillings or dipping sauces? The possibilities are endless! Gather your friends, roll up some sushi, and enjoy a low-carb sushi night that everyone will love. Your kitchen is about to become the go-to spot for sushi lovers!
With this guide to making Keto Sushi, you’ll find that satisfying your sushi cravings is easier than ever. Enjoy the process, get creative, and most importantly, have fun in the kitchen!
Share on Pinterest

Keto Sushi
Ingredients
For the Sushi:
- 4 cups cauliflower florets chopped
- 1/2 teaspoon salt
- 1 tablespoon white vinegar
- 2 tablespoons sugar-free powdered sugar
- 2 sheets Nori
- 2 tablespoons mayonnaise
- 1/4 cup sushi-grade salmon or protein of choice
- 1/2 small cucumber sliced into strips
- 1/8 teaspoon sesame seeds for garnish
- 1 serving wasabi optional
Instructions
Method:
- Step 1: Prepare the Cauliflower Rice - Start by chopping the cauliflower into florets. Use a food processor to pulse the florets until they resemble rice grains. This should yield about 4 cups of cauliflower rice.
- Step 2: Cook the Cauliflower - Transfer the cauliflower rice to a steamer or microwave-safe bowl. Steam it for about 5-7 minutes or until tender. Once cooked, let it cool slightly.
- Step 3: Season the Cauliflower Rice - In a mixing bowl, combine the cooked cauliflower rice with salt, white vinegar, and sugar-free powdered sugar. Mix well until all the ingredients are evenly distributed.
- Step 4: Prepare the Nori - Lay a sheet of nori on a bamboo rolling mat, shiny side down. Make sure it’s placed horizontally in front of you.
- Step 5: Spread the Cauliflower Rice - With wet hands (to prevent sticking), take a handful of the cauliflower rice mixture and spread it evenly over the nori, leaving about an inch of space at the top.
- Step 6: Add Fillings - In the center of the rice, place a line of the mayonnaise, followed by your choice of sushi-grade salmon (or other protein) and cucumber strips.
- Step 7: Roll the Sushi - Starting from the bottom, use the bamboo mat to gently roll the sushi away from you, applying slight pressure to ensure it holds together. Roll it tightly, stopping when you reach the open edge of the nori.
- Step 8: Seal the Roll - Use a little water to moisten the edge of the nori, then press it down to seal the roll.
- Step 9: Slice and Serve - With a sharp knife, slice the roll into bite-sized pieces. Sprinkle with sesame seeds for garnish. Serve with wasabi on the side for an extra kick!
Equipment
- Food Processor
- Steamer or Microwave
- Mixing Bowl
- Rolling Mat
- Sharp Knife
Notes
- Make sure to drain the cauliflower well to avoid soggy sushi.
- Experiment with different fillings like shrimp or tofu for variety.
- Store prepared sushi rolls in an airtight container for up to 24 hours.