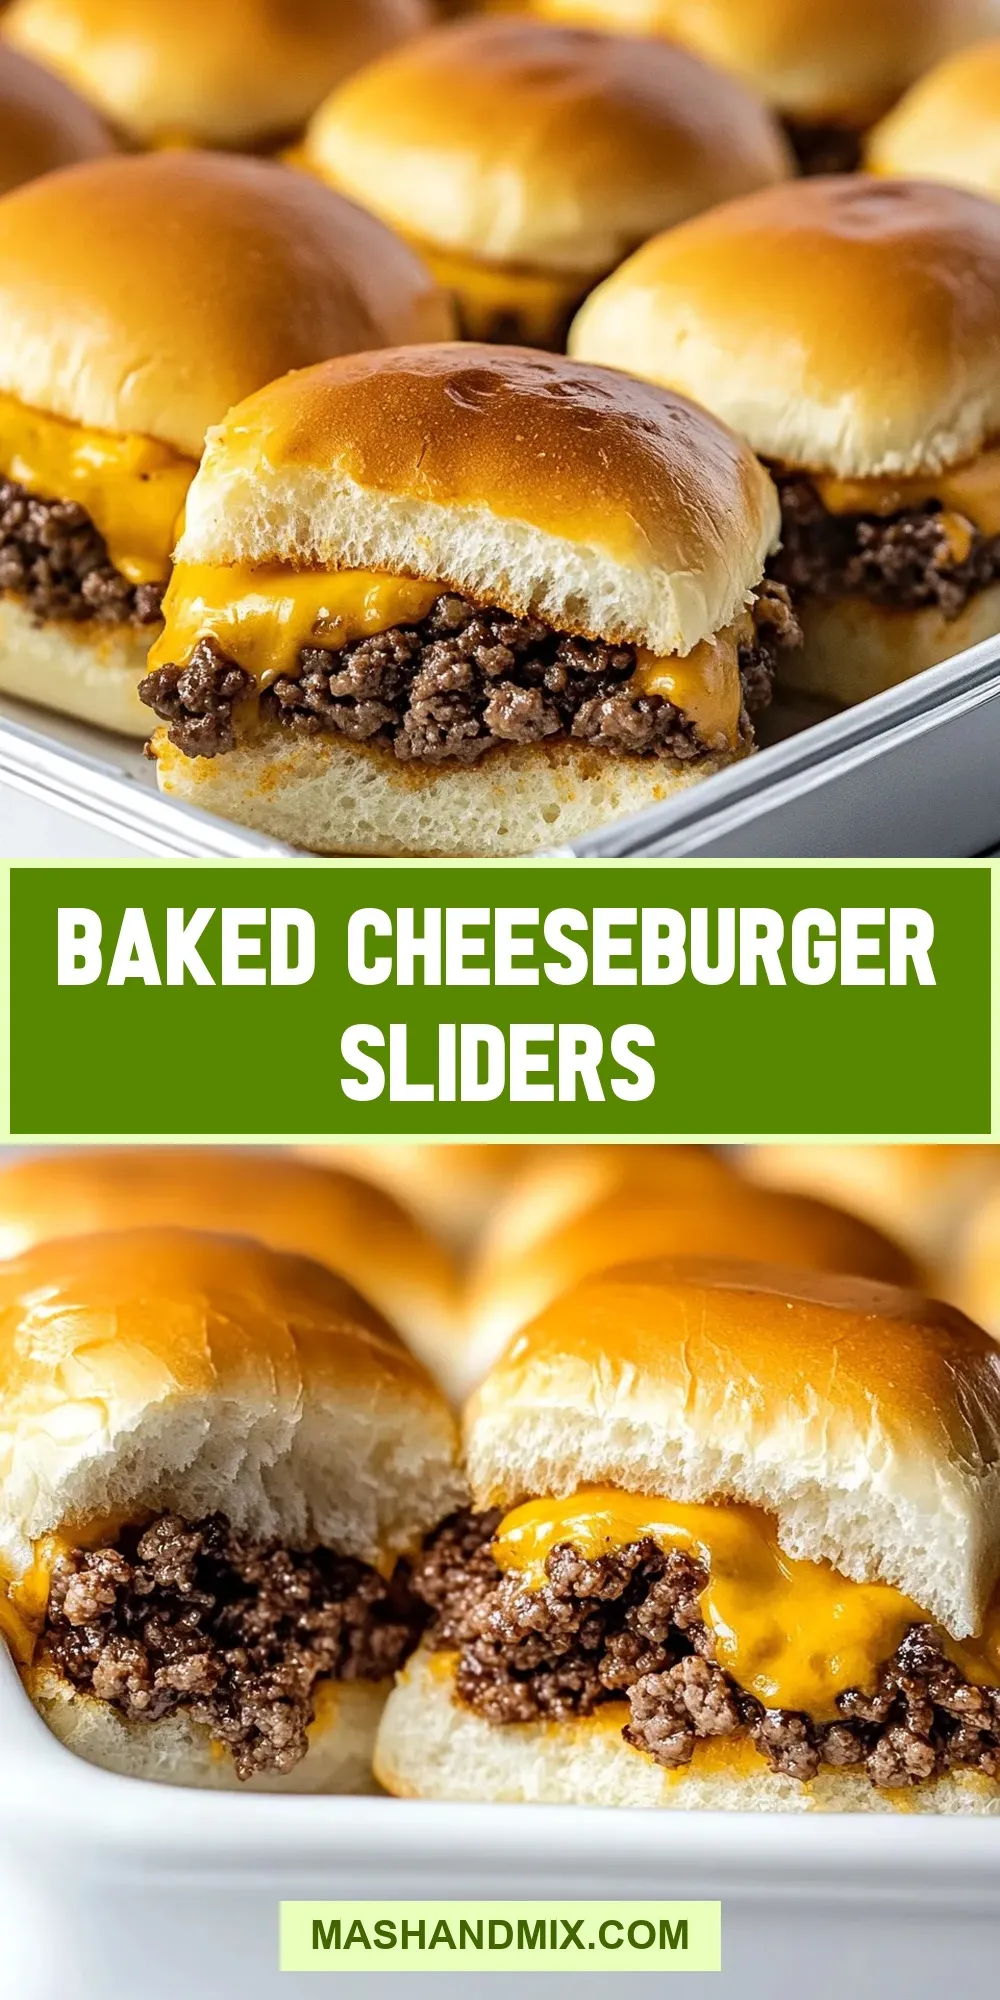
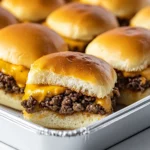
Imagine the perfect bite-sized burger, warm and cheesy, bursting with flavor and topped with your favorite condiments. These Baked Cheeseburger Sliders are just that! They are an irresistible addition to any gathering, game day, or cozy family dinner. With savory ingredients and the ease of baking, these sliders will quickly become a staple in your recipe rotation.
Why You’ll Keep Making It

There’s something about sliders that brings everyone together. These Baked Cheeseburger Sliders are not only delicious but also incredibly easy to prepare. You can whip them up in less than an hour, and they’re perfect for feeding a crowd. The combination of juicy ground beef, melty cheddar cheese, and soft slider buns makes for a mouthwatering experience that’s hard to resist. Plus, the recipe is versatile, allowing for various toppings and sauces based on your preferences!
Your Shopping Guide
Before you dive into this delightful recipe, here’s what you’ll need to gather:
- 1 pound lean ground beef
- 1 medium onion, finely chopped
- 2 medium garlic cloves, minced
- 3 tablespoons ketchup
- 1 tablespoon yellow mustard
- 1 teaspoon Montreal steak seasoning
- 1 teaspoon Worcestershire sauce
- 12 slider buns
- 12 1-ounce slices cheddar cheese
- 1 tablespoon extra virgin olive oil
- 1 tablespoon salted butter
- 1 teaspoon sesame seeds
Tools & Equipment Needed
Make sure you have the following tools on hand for easy cooking:
- Large skillet – for cooking the beef mixture.
- Baking dish – to bake the sliders in the oven.
- Spatula – for mixing and flipping.
- Cutting board and knife – for chopping the vegetables.
- Measuring spoons – for accuracy in ingredient amounts.
Baked Cheeseburger Sliders: Step-by-Step Guide

Step 1: Preheat the Oven
Preheat your oven to 350°F (175°C). This will ensure the sliders bake evenly and come out perfectly golden.
Step 2: Cook the Beef Mixture
In a large skillet, heat the extra virgin olive oil over medium heat. Add the finely chopped onion and minced garlic, sautéing until soft and fragrant, about 3-4 minutes.
Step 3: Brown the Beef
Add the lean ground beef to the skillet. Use your spatula to break it up as it cooks. Stir in the ketchup, yellow mustard, Montreal steak seasoning, and Worcestershire sauce. Cook until the beef is browned and fully cooked through, about 5-7 minutes. Remove from heat and set aside.
Step 4: Prepare the Slider Buns
While the beef mixture cools slightly, slice the slider buns in half horizontally, keeping them attached. Place the bottom half of the buns in a greased baking dish.
Step 5: Assemble the Sliders
Spread the beef mixture evenly over the bottom half of the slider buns. Place a slice of cheddar cheese on top of the beef mixture for each slider, then cover with the top half of the buns.
Step 6: Brush with Butter
In a small bowl, melt the salted butter and brush it over the tops of the slider buns. Sprinkle sesame seeds on top for that classic slider look.
Step 7: Bake
Cover the baking dish with aluminum foil and bake in the preheated oven for 15 minutes. Remove the foil and bake for an additional 10 minutes, or until the cheese is melted and the tops are golden brown.
Step 8: Serve and Enjoy
Remove the sliders from the oven and let them cool for a few minutes before slicing them apart. Serve warm with your favorite condiments and enjoy these delicious Baked Cheeseburger Sliders!
Swap Guide

If you want to personalize your sliders, consider these swaps:
- Ground turkey or chicken instead of beef for a lighter option.
- Swiss cheese, pepper jack, or your favorite cheese in place of cheddar.
- Vegan ground meat to make it plant-based.
- Add sautéed mushrooms or jalapeños for extra flavor.
Behind the Recipe
These sliders are not just a crowd-pleaser; they also have a rich history. Sliders originated in the United States, gaining popularity in the mid-20th century as a convenient and tasty way to serve burgers in smaller portions. The Baked Cheeseburger Sliders are a modern twist on this classic, offering a simple yet delicious way to enjoy the flavors of a cheeseburger without the hassle of grilling.
Leftovers & Meal Prep
If you happen to have leftovers, these sliders reheat beautifully! Here’s how to store and prepare them:
- Store leftover sliders in an airtight container in the refrigerator for up to 3 days.
- Reheat in the oven at 350°F (175°C) for about 10 minutes, or until heated through.
- These sliders can also be frozen. Wrap each slider tightly in plastic wrap and place in a freezer-safe bag for up to 3 months.
Helpful Q&A
Can I make these sliders ahead of time?
Yes! You can prepare the beef mixture and assemble the sliders a few hours in advance. Just cover and refrigerate until you’re ready to bake them.
What can I serve with these sliders?
These Baked Cheeseburger Sliders pair wonderfully with fries, coleslaw, or a fresh salad. You can also try serving them with Cheesesteak Potato Skins for a fun twist!
Can I use different types of buns?
Absolutely! Feel free to use whole wheat or gluten-free buns, or even lettuce wraps to make them low-carb.
How do I keep the sliders from getting soggy?
Make sure to drain any excess grease from the beef mixture before assembling the sliders, and don’t over-saturate the buns with condiments until you’re ready to serve.
If you love these sliders, you might also enjoy:
Let’s Eat
Gather your friends and family, and get ready to dig into these cheesy, savory, and absolutely delightful Baked Cheeseburger Sliders. This recipe is sure to leave everyone craving more! Whether it’s for game day, a party, or just a simple weeknight dinner, sliders are always a hit. Enjoy every bite and the smiles they bring!
Share on Pinterest
Baked Cheeseburger Sliders
Ingredients
- 1 pound lean ground beef
- 1 medium onion, finely chopped
- 2 medium garlic cloves, minced
- 3 tablespoons ketchup
- 1 tablespoon yellow mustard
- 1 teaspoon Montreal steak seasoning
- 1 teaspoon Worcestershire sauce
- 12 slider buns
- 12 1-ounce slices cheddar cheese
- 1 tablespoon extra virgin olive oil
- 1 tablespoon salted butter
- 1 teaspoon sesame seeds
Instructions
- Preheat your oven to 350°F (175°C).
- In a large skillet, heat the extra virgin olive oil over medium heat. Add the finely chopped onion and minced garlic, sautéing until soft and fragrant, about 3-4 minutes.
- Add the lean ground beef to the skillet. Use your spatula to break it up as it cooks. Stir in the ketchup, yellow mustard, Montreal steak seasoning, and Worcestershire sauce. Cook until the beef is browned and fully cooked through, about 5-7 minutes. Remove from heat and set aside.
- While the beef mixture cools slightly, slice the slider buns in half horizontally, keeping them attached. Place the bottom half of the buns in a greased baking dish.
- Spread the beef mixture evenly over the bottom half of the slider buns. Place a slice of cheddar cheese on top of the beef mixture for each slider, then cover with the top half of the buns.
- In a small bowl, melt the salted butter and brush it over the tops of the slider buns. Sprinkle sesame seeds on top.
- Cover the baking dish with aluminum foil and bake in the preheated oven for 15 minutes. Remove the foil and bake for an additional 10 minutes, or until the cheese is melted and the tops are golden brown.
- Remove the sliders from the oven and let them cool for a few minutes before slicing them apart. Serve warm with your favorite condiments.
Equipment
- Large Skillet
- Baking Dish
- Spatula
- Cutting Board
- Knife
- Measuring spoons
Notes
- Feel free to use ground turkey or chicken for a lighter option.
- Experiment with different cheeses like Swiss or pepper jack.
- Store leftovers in an airtight container for up to 3 days.