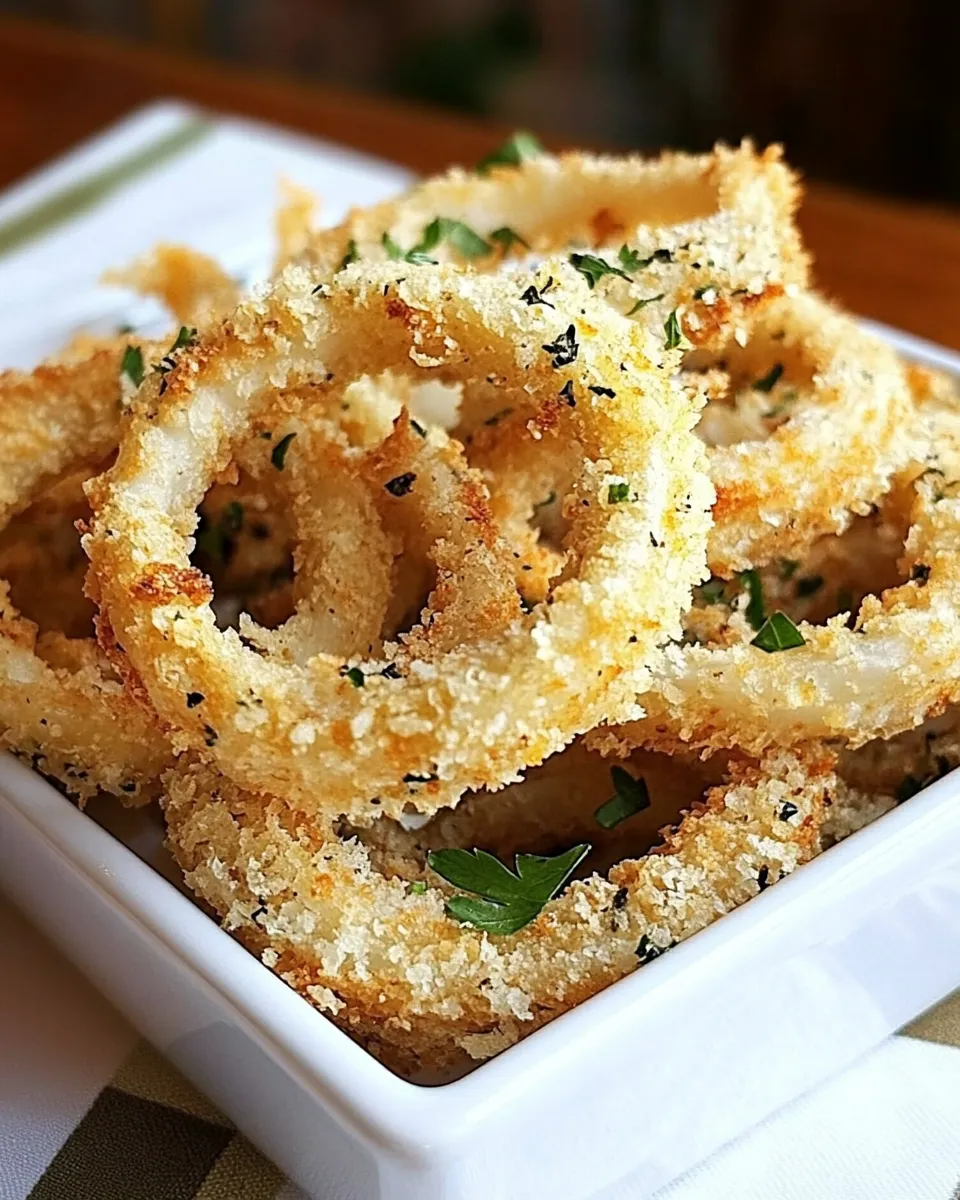
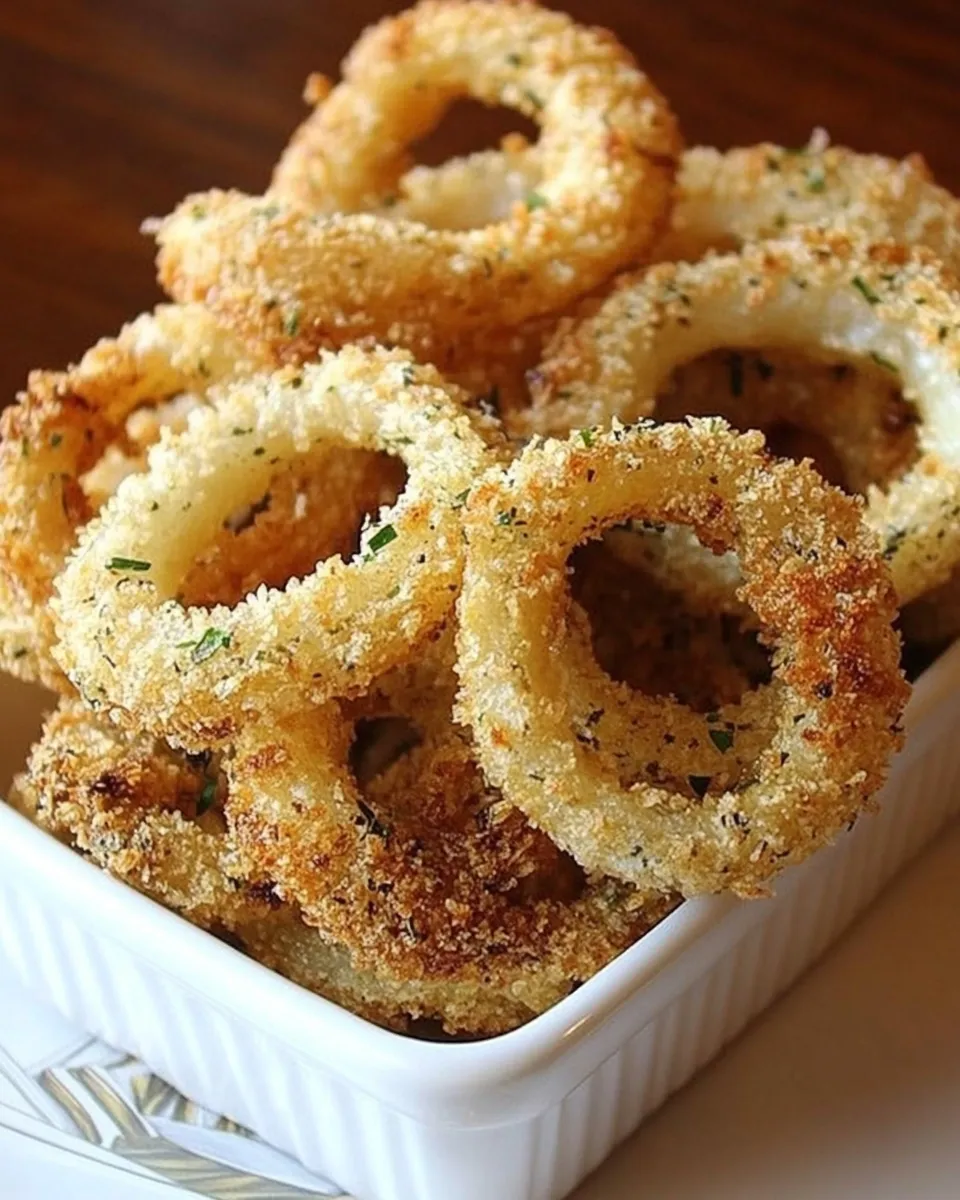
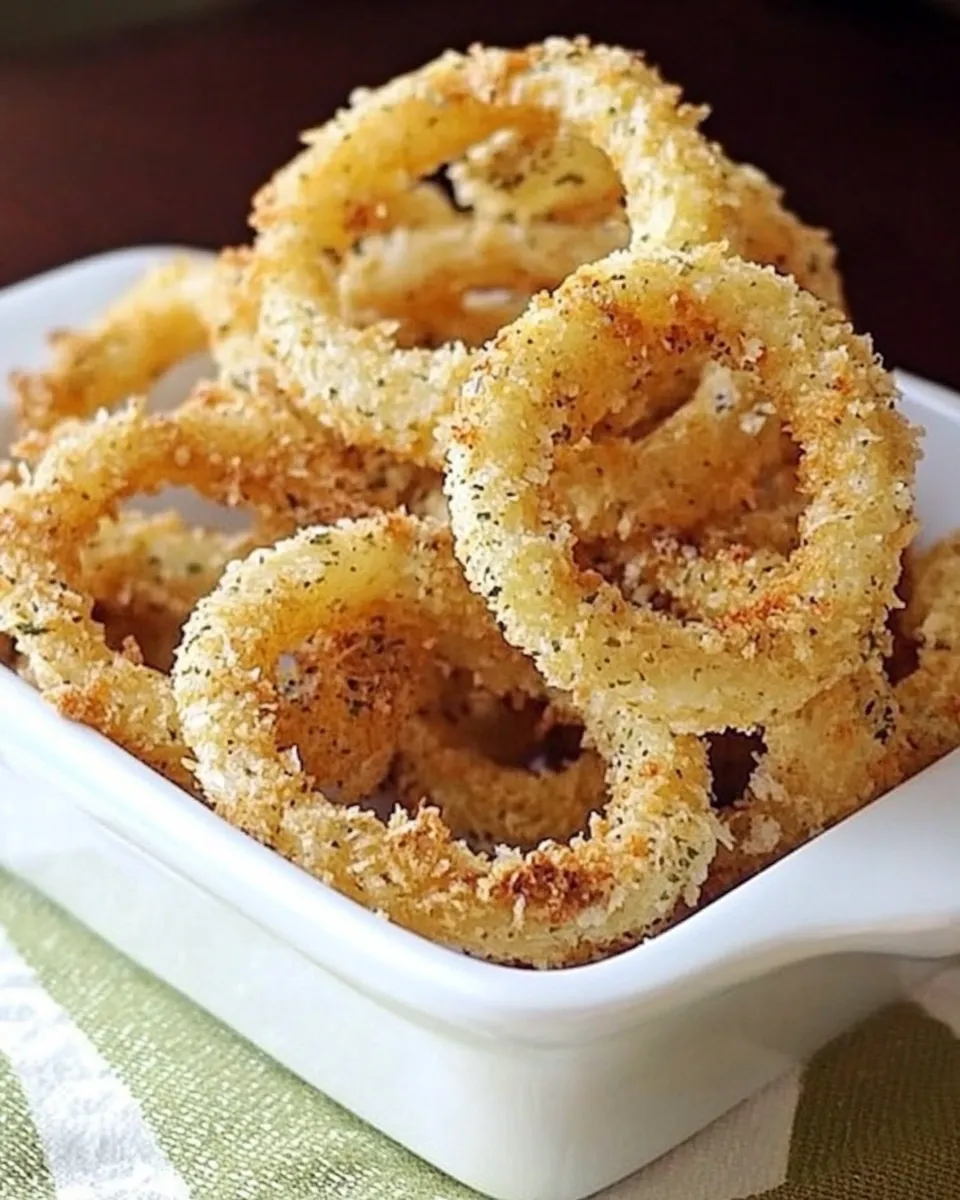
There’s something undeniably satisfying about the crunch of a perfectly cooked onion ring. It’s that delightful combination of savory and sweet, with a satisfying crisp that makes you want to reach for just one more. These Baked Onion Rings are a healthier take on the classic, allowing you to indulge without the guilt. With a crispy coating and a tender onion center, they make for a perfect snack or side dish. Let’s dive into how you can create these delicious bites right in your own kitchen.
Why I Love This Recipe
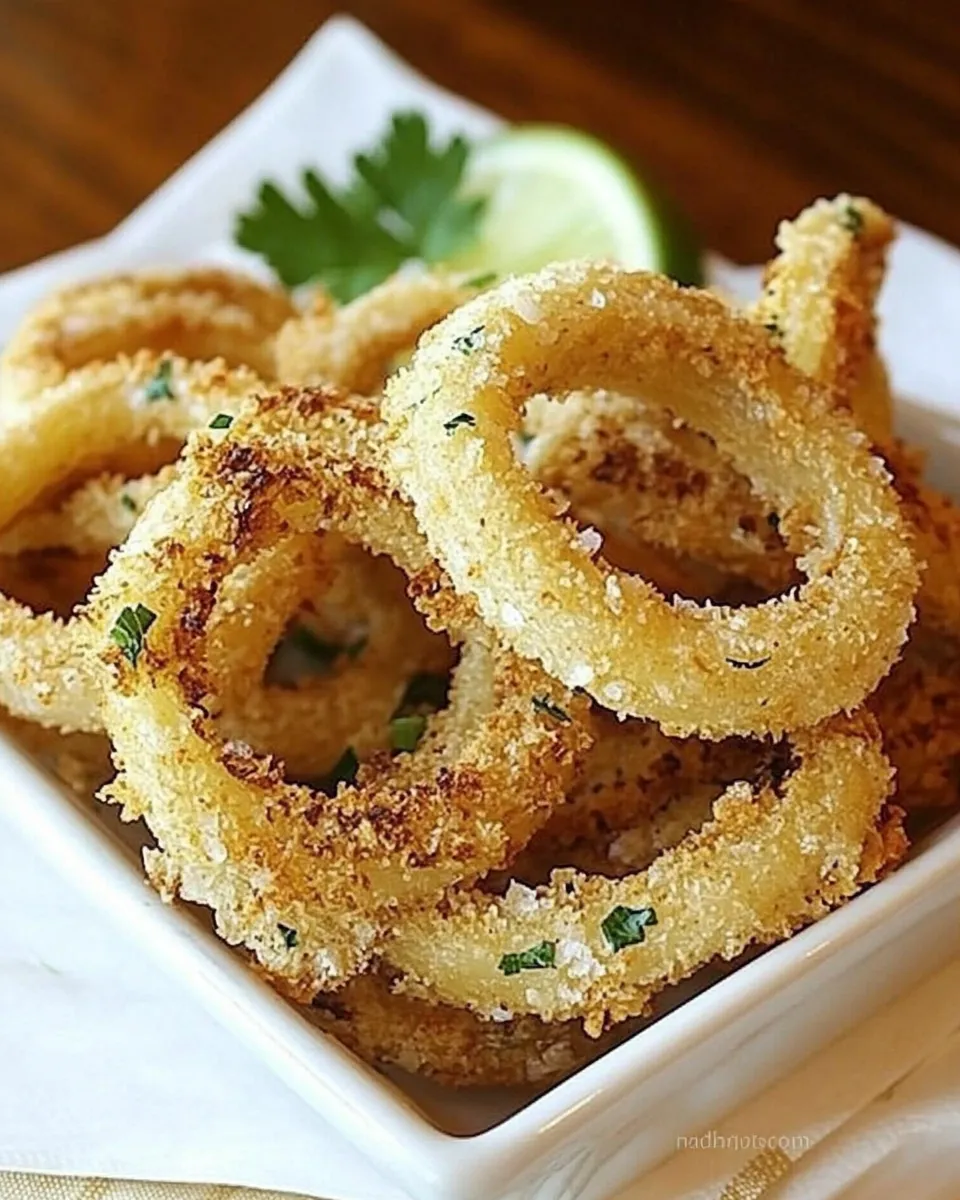
This Baked Onion Rings recipe is a personal favorite because it captures the essence of comfort food while keeping it light and nutritious. With simple ingredients that you probably already have at home, you can whip up a batch in no time. The use of buttermilk gives the onion rings a tender bite, and the combination of panko, whole wheat, and cornflake crumbs provides a delightful crunch that’s hard to resist. Plus, baking them instead of frying means you can enjoy these onion rings without the excess oil and calories, making them a great option for both casual gatherings and cozy nights in.
Your Shopping Guide
To make these scrumptious Baked Onion Rings, you’ll need to gather the following ingredients:
- 1 medium onion – sliced into 1/4 inch rings
- 2 1/4 cups low fat buttermilk – for soaking the onions
- 1/2 cup panko bread crumbs – these give a fantastic crunch
- 1/4 cup Italian seasoned whole wheat bread crumbs – adds flavor and texture
- 1/4 cup crushed corn flake crumbs – an unexpected twist for extra crispiness
- Salt to taste – to enhance the flavors
- Olive oil baking spray – I used my Misto for an even coat
Make sure to check your pantry for these items before heading to the grocery store!
Recommended Tools
To make the process smooth and easy, here are a few tools you’ll want to have on hand:
- Sharp knife – for slicing the onion into perfect rings
- Cutting board – to protect your counters while chopping
- Baking sheet – for crisping up those onion rings in the oven
- Mixing bowls – for soaking and coating the onion rings
- Cooling rack – optional, but great for keeping rings crispy
With these tools, you’ll be ready to tackle your Baked Onion Rings like a pro!
The Method for Baked Onion Rings
Step 1: Prepare the Onions
Start by slicing your medium onion into 1/4 inch rings. Aim for even slices to ensure consistent cooking. Once sliced, separate the rings gently and set them aside.
Step 2: Soak in Buttermilk
In a mixing bowl, pour in the 2 1/4 cups of low fat buttermilk. Submerge the onion rings in the buttermilk, making sure they’re well-coated. Allow them to soak for at least 30 minutes. This step is crucial as it helps to tenderize the onions and ensures the coating adheres better.
Step 3: Prepare the Coating
While the onions are soaking, preheat your oven to 425°F (220°C). In another mixing bowl, combine the panko bread crumbs, Italian seasoned whole wheat bread crumbs, and crushed corn flake crumbs. Add salt to taste and mix well to combine all the dry ingredients.
Step 4: Coat the Onion Rings
After the soaking time, remove the onion rings from the buttermilk, allowing any excess to drip off. One by one, dip each ring into the breadcrumb mixture, pressing gently to ensure a good coating. Place the coated rings on a baking sheet lined with parchment paper.
Step 5: Spray and Bake
Once all the onion rings are on the baking sheet, give them a light spray with olive oil baking spray. This will help them to achieve that golden-brown color. Bake in the preheated oven for about 20-25 minutes or until the rings are crispy and golden, flipping them halfway through.
Step 6: Enjoy!
Once done, remove the Baked Onion Rings from the oven and let them cool for a few minutes. Serve warm with your favorite dipping sauces, and enjoy the delightful crunch!
Flavor-Forward Alternatives
If you’re looking to switch things up, consider these flavor-forward alternatives for your Baked Onion Rings:
- Spicy Kick: Add cayenne pepper or paprika to the breadcrumb mixture for some heat.
- Garlic Lovers: Incorporate garlic powder into the coating for an aromatic twist.
- Herb Infusion: Mix in dried herbs like oregano or thyme to elevate the flavor profile.
- Cheesy Delight: Add finely grated parmesan cheese to the breadcrumb mixture for a cheesy crust.
Feel free to get creative based on your preferences!
Pro Perspective
When making Baked Onion Rings, remember that the key to a crispy texture lies in the coating. The combination of panko and corn flake crumbs provides a unique crunch that standard breadcrumbs can’t match. Additionally, letting the onion rings soak in buttermilk is not just for flavor; it also works wonders in keeping the onions tender while giving the crust something to cling to. If you want to take it a step further, consider experimenting with different types of onions. Sweet onions can add a wonderful flavor contrast, while yellow onions are more classic and robust.
Storing, Freezing & Reheating
For the best taste experience, enjoy your Baked Onion Rings fresh out of the oven. However, if you have leftovers, here’s how to store and reheat them:
- Storing: Place cooled onion rings in an airtight container in the refrigerator for up to 3 days.
- Freezing: To freeze, lay the rings in a single layer on a baking sheet and freeze until solid. Transfer to a freezer-safe bag for up to 2 months.
- Reheating: For the best texture, reheat in the oven at 400°F (200°C) for about 10-15 minutes, or until crispy again.
This way, you can enjoy your Baked Onion Rings at your convenience!
Ask & Learn
Can I use other types of onions for this recipe?
Absolutely! While yellow onions are traditional, you can experiment with sweet onions like Vidalia or even red onions for a different flavor profile.
Is there a way to make these onion rings spicier?
Yes! You can add cayenne pepper or a dash of hot sauce to the buttermilk for a spicy kick. You can also mix chili powder into the breadcrumb coating for added heat.
What can I serve with Baked Onion Rings?
Baked Onion Rings pair perfectly with dipping sauces like ranch, barbecue sauce, or even a spicy mayo. They also make a great side dish for burgers, sandwiches, or salads.
Can I make these onion rings gluten-free?
Definitely! Substitute the bread crumbs with gluten-free options such as gluten-free panko and crushed gluten-free corn flakes. Just ensure that your buttermilk is also gluten-free.
If you enjoyed this recipe, you might want to check out some of these delicious options:
Bring It Home
There you have it—an easy, delicious way to make Baked Onion Rings that will impress your family and friends. With their crunchy coating and sweet onion flavor, these rings are sure to become a staple in your snack repertoire. Whether you enjoy them alone or as part of a meal, they’re a delightful treat that brings joy to any occasion. So gather your ingredients, preheat that oven, and get ready to savor the goodness of homemade Baked Onion Rings. Happy cooking!
Baked Onion Rings
Ingredients
For the Onion Rings:
- 1 medium onion sliced into 1/4 inch rings
- 2.25 cups low fat buttermilk for soaking the onions
- 0.5 cup panko bread crumbs these give a fantastic crunch
- 0.25 cup Italian seasoned whole wheat bread crumbs adds flavor and texture
- 0.25 cup crushed corn flake crumbs an unexpected twist for extra crispiness
- to taste Salt to enhance the flavors
- as needed Olive oil baking spray for coating
Instructions
Instructions:
- Step 1: Prepare the Onions - Start by slicing your medium onion into 1/4 inch rings. Aim for even slices to ensure consistent cooking. Once sliced, separate the rings gently and set them aside.
- Step 2: Soak in Buttermilk - In a mixing bowl, pour in the 2 1/4 cups of low fat buttermilk. Submerge the onion rings in the buttermilk, making sure they’re well-coated. Allow them to soak for at least 30 minutes.
- Step 3: Prepare the Coating - While the onions are soaking, preheat your oven to 425°F (220°C). In another mixing bowl, combine the panko bread crumbs, Italian seasoned whole wheat bread crumbs, and crushed corn flake crumbs. Add salt to taste and mix well.
- Step 4: Coat the Onion Rings - After soaking, remove the onion rings from the buttermilk, allowing excess to drip off. Dip each ring into the breadcrumb mixture, pressing gently to ensure a good coating. Place on a baking sheet lined with parchment paper.
- Step 5: Spray and Bake - Give the coated onion rings a light spray with olive oil baking spray. Bake for about 20-25 minutes or until crispy and golden, flipping halfway through.
- Step 6: Enjoy! - Remove from the oven and let them cool for a few minutes. Serve warm with your favorite dipping sauces.
Equipment
- Sharp Knife
- Cutting Board
- Baking Sheet
- Mixing Bowls
- Cooling rack
Notes
- For extra flavor, add cayenne or paprika to the breadcrumb mixture.
- Try adding garlic powder for a delicious twist.
- For a cheesy crust, mix in grated parmesan cheese with the breadcrumbs.