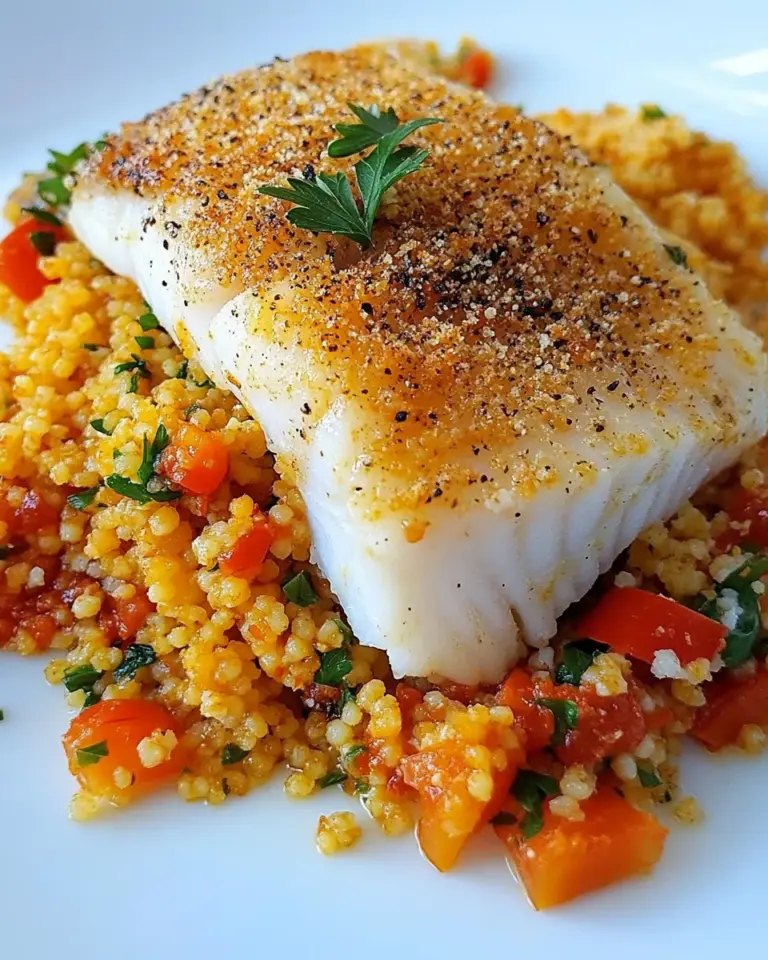
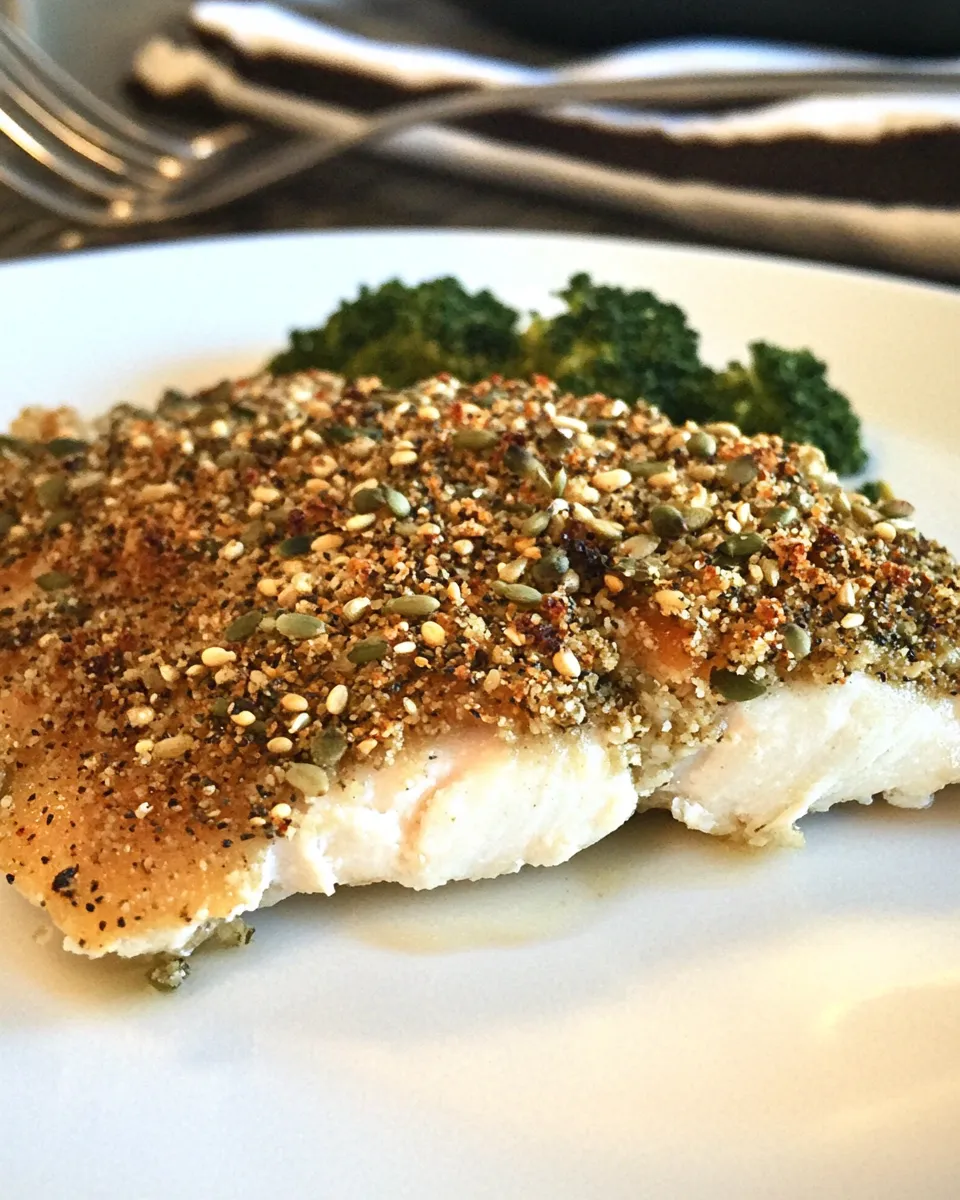
Looking for a delicious and healthy dinner option that’s easy to prepare? Look no further than Pumpkin Seed Encrusted Baked Tilapia! This delightful dish combines the mild flavor of tilapia with a crunchy pumpkin seed and panko crust, making it a perfect choice for a family meal or a cozy dinner for two. The best part? It’s baked, not fried, so you can indulge without the guilt. Let’s dive into why this recipe deserves a spot in your weekly meal rotation!
Why Pumpkin Seed Encrusted Baked Tilapia is Worth Your Time
Pumpkin Seed Encrusted Baked Tilapia is not just a pretty dish; it’s packed with nutrients and flavor. Tilapia is a fantastic source of lean protein, making it a great option for those looking to maintain or lose weight. The pumpkin seeds add a delightful crunch and are also rich in magnesium, zinc, and healthy fats. This recipe is quick to prepare, taking less than 30 minutes from start to finish, and the combination of garlic, olive oil, and fresh herbs elevates the flavor profile to new heights. It’s an ideal choice for busy weeknights or when you want to impress guests without spending hours in the kitchen.
Ingredients at a Glance
- 2 tbsp raw, unsalted pumpkin seeds
- 2 tbsp panko crumbs
- 1 tsp dry parsley
- Course salt such as kosher
- Fresh cracked pepper
- 4 pieces, 5.5 oz each tilapia filets
- 1 tsp olive oil
- 2 cloves garlic, crushed
- Olive oil spray (I used my Misto)
Setup & Equipment
- Oven: Preheat it to 400°F (200°C) for baking.
- Baking sheet: Line it with parchment paper for easy cleanup.
- Food processor: Perfect for grinding the pumpkin seeds if you want a finer texture.
- Mixing bowl: For combining the crust ingredients.
- Cooking spray: To prevent sticking.
Pumpkin Seed Encrusted Baked Tilapia, Made Easy
Step 1: Preheat the Oven
Begin by preheating your oven to 400°F (200°C). This ensures that your tilapia will bake evenly and develop a lovely, golden crust.
Step 2: Prepare the Crust Mixture
In a mixing bowl, combine the raw pumpkin seeds, panko crumbs, dry parsley, a generous pinch of kosher salt, and fresh cracked pepper. If you prefer a finer texture, pulse the pumpkin seeds in a food processor a couple of times before mixing.
Step 3: Season the Tilapia
Take the tilapia filets and pat them dry with paper towels. Drizzle the olive oil over the fish and rub it in gently. This will help the crust stick and enhance the flavor of the fish.
Step 4: Add Garlic
Sprinkle the crushed garlic evenly over the tilapia filets, ensuring that the garlic is distributed well for maximum flavor.
Step 5: Coat the Tilapia
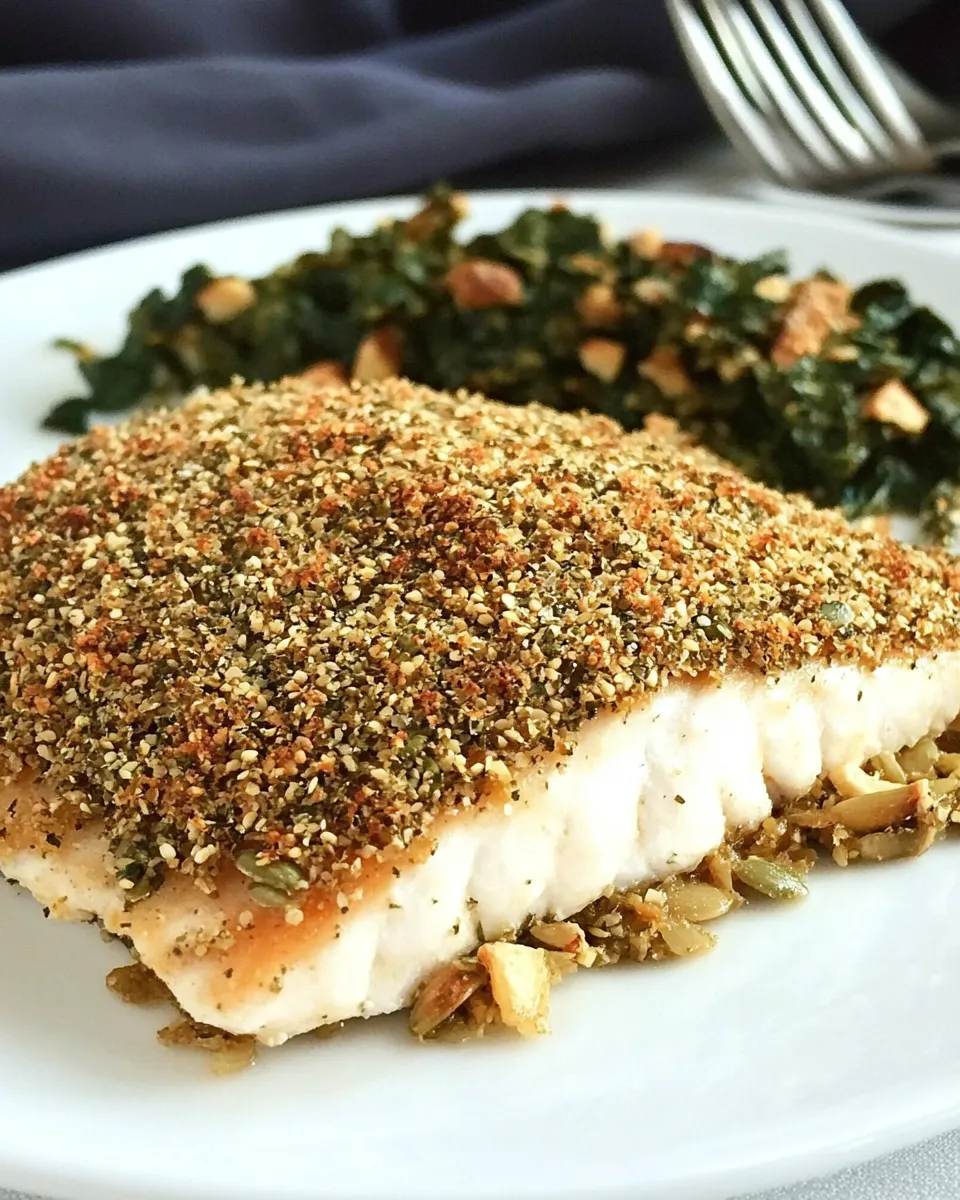
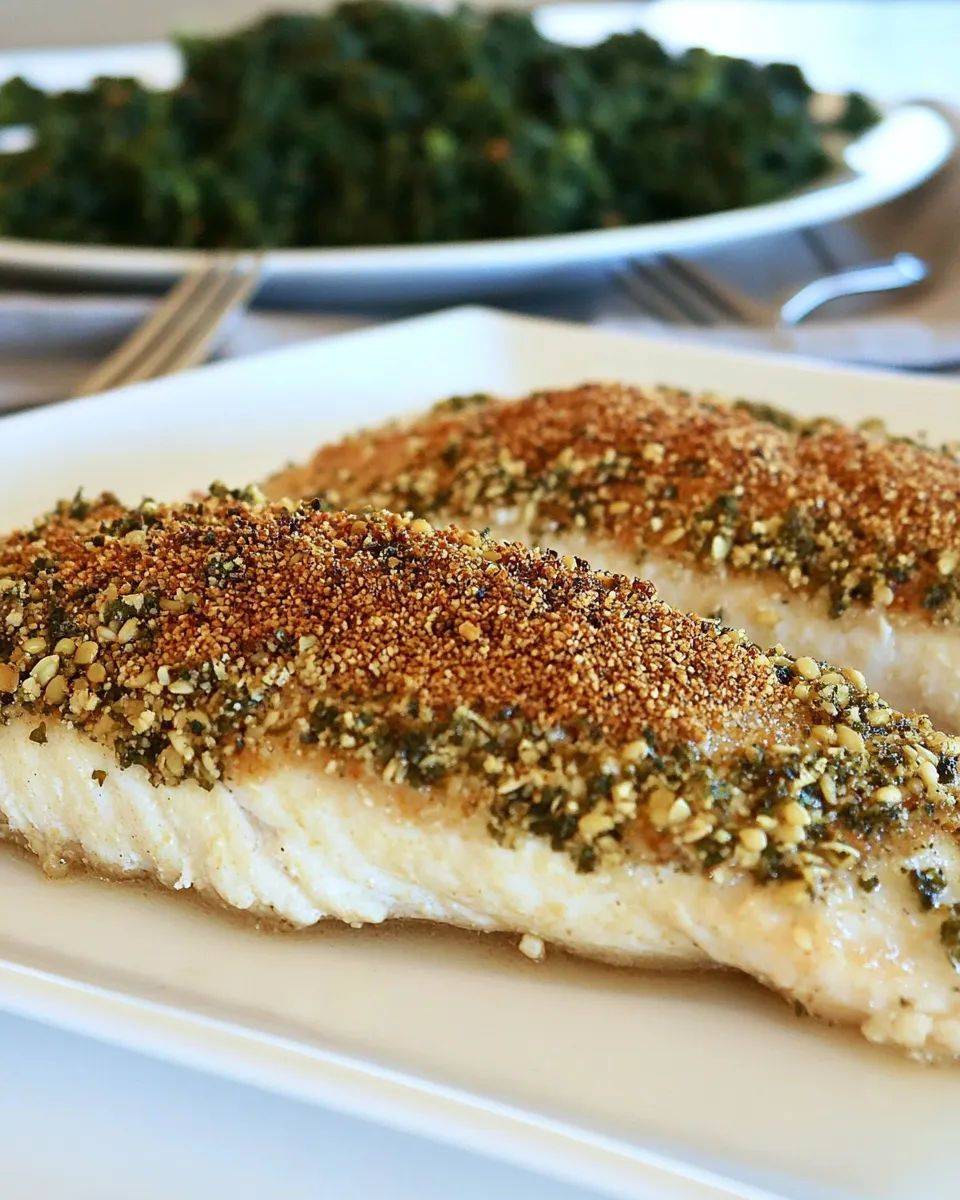
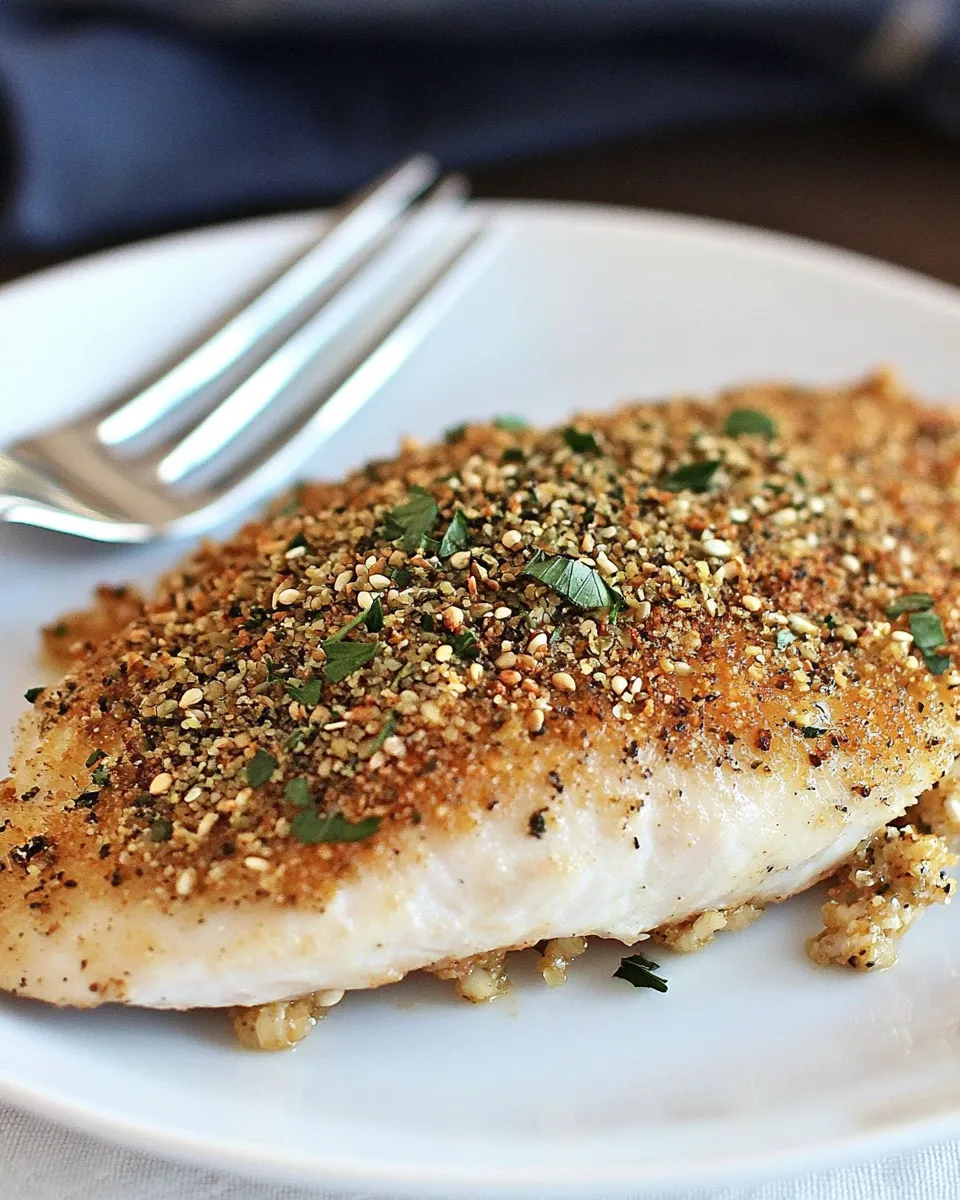
Press the pumpkin seed and panko mixture onto the top of each tilapia filet, ensuring that they are well-coated. The more crust you can get on there, the better!
Step 6: Bake the Tilapia
Place the coated tilapia filets on the prepared baking sheet. Lightly spray the top of the filets with olive oil spray to help the crust become crispy as it bakes. Bake in the preheated oven for about 15-20 minutes, or until the fish flakes easily with a fork and the crust is golden brown.
Step 7: Serve and Enjoy
Once your Pumpkin Seed Encrusted Baked Tilapia is ready, remove it from the oven and let it rest for a couple of minutes. Serve it with your favorite sides, such as steamed vegetables or a fresh salad, and enjoy this nutritious meal!
Allergy-Friendly Substitutes
- If you have a nut allergy, you can replace pumpkin seeds with sunflower seeds.
- For gluten-free options, use gluten-free panko crumbs.
- If you are allergic to fish, try this same crust on chicken breast or eggplant slices.
- To make this dish dairy-free, simply ensure your panko crumbs do not contain any dairy ingredients.
Recipe Notes & Chef’s Commentary
When preparing Pumpkin Seed Encrusted Baked Tilapia, it’s important to ensure that your fish is fresh for the best flavor and texture. You can also experiment with different herbs and spices in the crust, such as smoked paprika or Italian seasoning, to customize the flavor to your liking. This dish is not only delicious but also versatile – feel free to pair it with various sides or sauces.
- For an extra kick, add a squeeze of fresh lemon juice over the baked tilapia before serving.
- This recipe can easily be doubled or halved depending on your needs.
- Store any leftovers in an airtight container in the refrigerator for up to two days; simply reheat in the oven or microwave.
Save It for Later
If you love this recipe as much as we do, be sure to save it to your recipe box or pin it for later! This Pumpkin Seed Encrusted Baked Tilapia is one of those dishes that you’ll want to revisit again and again. Whether you’re cooking for yourself or for a crowd, it’s sure to impress.
Popular Questions
Can I use frozen tilapia for this recipe?
Yes, frozen tilapia works well! Just make sure to thaw it completely and pat it dry before seasoning and coating with the crust.
What sides pair well with Pumpkin Seed Encrusted Baked Tilapia?
This dish pairs beautifully with steamed asparagus, quinoa salad, or a light cucumber and tomato salad. The options are endless!
How do I know when the tilapia is done cooking?
The tilapia is done when it flakes easily with a fork and has an internal temperature of 145°F (63°C). The crust should also be golden and crispy.
Can I prepare the crust ahead of time?
Absolutely! You can prepare the crust mixture a day in advance and store it in an airtight container in the refrigerator. Just coat your tilapia right before baking.
Final Thoughts
Pumpkin Seed Encrusted Baked Tilapia is a delightful dish that will brighten any dinner table. With its crispy crust and tender fish, it’s a perfect example of how healthy eating can be both satisfying and flavorful. This recipe is easy to master and offers plenty of room for customization, making it an excellent addition to your culinary repertoire. Whether you’re cooking for yourself or for loved ones, this dish is sure to become a favorite. So gather your ingredients, preheat that oven, and get ready to enjoy a meal that’s as nutritious as it is delicious!

Pumpkin Seed Encrusted Baked Tilapia
Ingredients
- 2 tbsp raw, unsalted pumpkin seeds
- 2 tbsp panko crumbs
- 1 tsp dry parsley
- Course salt such as kosher to taste
- Fresh cracked pepper to taste
- 4 pieces tilapia filets 5.5 oz each
- 1 tsp olive oil
- 2 cloves garlic crushed
- Olive oil spray for coating
Instructions
- Begin by preheating your oven to 400°F (200°C) to ensure even baking.
- In a mixing bowl, combine the raw pumpkin seeds, panko crumbs, dry parsley, kosher salt, and fresh cracked pepper. For a finer texture, pulse the pumpkin seeds in a food processor before mixing.
- Pat the tilapia filets dry with paper towels. Drizzle the olive oil over the fish and rub it in to help the crust stick.
- Sprinkle the crushed garlic evenly over the tilapia filets for maximum flavor.
- Press the pumpkin seed and panko mixture onto each tilapia filet, ensuring they are well-coated.
- Place the coated tilapia on the prepared baking sheet. Lightly spray the tops with olive oil spray and bake for 15-20 minutes, or until the fish flakes easily and the crust is golden brown.
- Remove from the oven and let the tilapia rest for a couple of minutes. Serve with your favorite sides and enjoy!
Equipment
- Oven
- Baking Sheet
- Food Processor
- Mixing Bowl
- Cooking spray
Notes
- For an extra kick, add a squeeze of fresh lemon juice before serving.
- This recipe can be doubled or halved as needed.
- Store leftovers in an airtight container for up to two days; reheat in the oven or microwave.