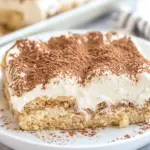
No Bake Shortbread Tiramisu Dessert
This No Bake Shortbread Tiramisu Dessert is a creamy, coffee-infused delight that's sure to impress!
Servings: 8 servings
Ingredients
For the Dessert:
- 25.3 ounces Walkers Shortbread Fingers (16 cookies)
- 6 ounces hot water
- 3 teaspoons instant espresso powder heaping
- 8 ounces cream cheese room temperature
- 1.5 cups powdered sugar
- 1 teaspoon vanilla extract
- 0.5 teaspoon rum extract (optional)
- 1 cup heavy whipping cream
- 1 ounce baking chocolate semi-sweet or 1-2 tablespoons unsweetened cocoa powder
Instructions
Instructions
- Step 1: Prepare the Coffee Mixture. In a small bowl, combine the hot water and instant espresso powder. Stir until the espresso powder is fully dissolved. Set aside to cool.
- Step 2: Make the Cream Cheese Mixture. In a large mixing bowl, beat the cream cheese until smooth. Gradually add the powdered sugar and mix until well combined. Add the vanilla extract and rum extract (if using) and mix again until incorporated.
- Step 3: Whip the Cream. In another bowl, whip the heavy cream until stiff peaks form. This will add lightness to your filling.
- Step 4: Combine Mixtures. Gently fold the whipped cream into the cream cheese mixture using a rubber spatula. Be careful not to deflate the whipped cream; you want to keep it light and airy.
- Step 5: Assemble the Dessert. Dip half of the Walkers Shortbread Fingers into the cooled espresso mixture, making sure they are coated but not soggy. Arrange a layer of the soaked shortbread in the bottom of your baking dish.
- Step 6: Add the Cream Layer. Spread half of the cream mixture over the layer of shortbread, smoothing it out evenly.
- Step 7: Repeat Layers. Repeat the process with the remaining shortbread fingers, soaking them in the espresso mixture, and then adding the last half of the cream mixture on top.
- Step 8: Chill to Set. Cover the dish with plastic wrap and refrigerate for at least 4 hours, or overnight if possible. This allows the flavors to meld beautifully.
- Step 9: Serve and Enjoy. Before serving, sprinkle the top with grated baking chocolate or cocoa powder for a finishing touch. Cut into squares and serve chilled.
Equipment
- Mixing Bowls
- Electric Mixer
- 9x9-inch Baking Dish
- Rubber Spatula
- Measuring cups and spoons
- Whisk
Notes
- Store in an airtight container in the refrigerator for up to 3 days.
- For longer storage, freeze individual portions and thaw in the refrigerator before serving.
- Avoid adding toppings like cocoa powder or chocolate until just before serving to maintain freshness.