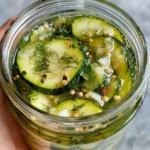
Dill-Garlic Pickled Zucchini Chips
These Dill-Garlic Pickled Zucchini Chips are a tangy, crunchy snack bursting with fresh dill and garlic flavors—quick to make and perfect for snacking or topping meals!
Servings: 4 servings
Ingredients
- 2 medium zucchini sliced into thin rounds
- 1 cup distilled white vinegar
- 1 cup water
- 2 tablespoons salt
- 1 tablespoon sugar
- 4 cloves garlic sliced
- 2 teaspoons dill seeds
- 1 teaspoon black peppercorns
- 0.5 teaspoon red pepper flakes optional
Instructions
Step 1: Prepare the Zucchini
- Start by washing your zucchini thoroughly under cold water. Using a sharp knife or a mandoline slicer, cut the zucchini into thin, even rounds, about 1/8 inch thick. Thin slices ensure the zucchini soaks up the pickling brine quickly and results in a crisp texture. Set the sliced zucchini aside while you prepare the pickling liquid.
Step 2: Make the Brine
- In a medium saucepan, combine the distilled white vinegar, water, salt, and sugar. Heat the mixture over medium heat, stirring occasionally, until the salt and sugar dissolve completely. Once dissolved, remove the brine from heat and allow it to cool slightly.
Step 3: Assemble the Jars
- In clean glass jars, layer the sliced zucchini rounds. Add the sliced garlic cloves, dill seeds, black peppercorns, and red pepper flakes if using. Distribute these aromatics evenly between the jars to ensure every bite gets a burst of flavor.
Step 4: Pour the Brine
- Carefully pour the warm brine over the zucchini slices in the jars, making sure the zucchini is fully submerged. Leave a little space at the top of the jar to allow for expansion. Seal the jars tightly with lids.
Step 5: Let Them Pickle
- Allow the jars to cool to room temperature, then place them in the refrigerator. For the best flavor and crunch, let the zucchini pickle for at least 24 hours before enjoying. The chips will keep well in the fridge for up to 2 weeks.
Equipment
- Sharp Knife or Mandoline Slicer
- Medium Saucepan
- Glass Jars
Notes
- Slice zucchini very thinly to ensure crisp, evenly pickled chips.
- Sterilize jars before use to extend shelf life and prevent spoilage.
- Use clean utensils when removing chips to maintain freshness and avoid contamination.
- Try adding fresh herbs or different spices for unique flavor variations.
- Store pickled zucchini chips in the refrigerator and enjoy within two weeks for best texture and flavor.